> ## Documentation Index
> Fetch the complete documentation index at: https://docs.flashduty.com/llms.txt
> Use this file to discover all available pages before exploring further.
# Google Cloud Monitoring Alert Events
> Sync Google Cloud Monitoring alert events to Flashduty via webhook for automated alert noise reduction
Sync Google Cloud Monitoring alert events to Flashduty via webhook for automated alert noise reduction.
## In Flashduty
***
You can obtain an integration push URL through either of these two methods:
### Using Private Integration
Choose this simpler option when you don't need to route alert events to different channels.
Expand
1. Go to the Flashduty console, select **Channel**, and enter a channel's details page
2. Select the **Integrations** tab, click **Add Integration** to enter the integration page
3. Choose **Google Cloud Monitoring** integration and click **Save** to generate a card
4. Click the generated card to view the **push URL**, copy it for later use, and you're done
### Using Shared Integration
Choose this option when you need to route alerts to different channels based on the alert event's payload information.
Expand
1. Go to the Flashduty console, select **Integration Center => Alert Events** to enter the integration selection page
2. Select **Google Cloud Monitoring** integration:
* **Integration Name**: Define a name for this integration
3. Configure the default route and select the corresponding channel (after the integration is created, you can go to `Route` to configure more routing rules)
4. Click **Save** and copy the newly generated **push URL** for later use
5. Done
## In Google Cloud
***
## I. Google Cloud Monitoring Alert Push Configuration
### Step 1: Configure Alert Channel
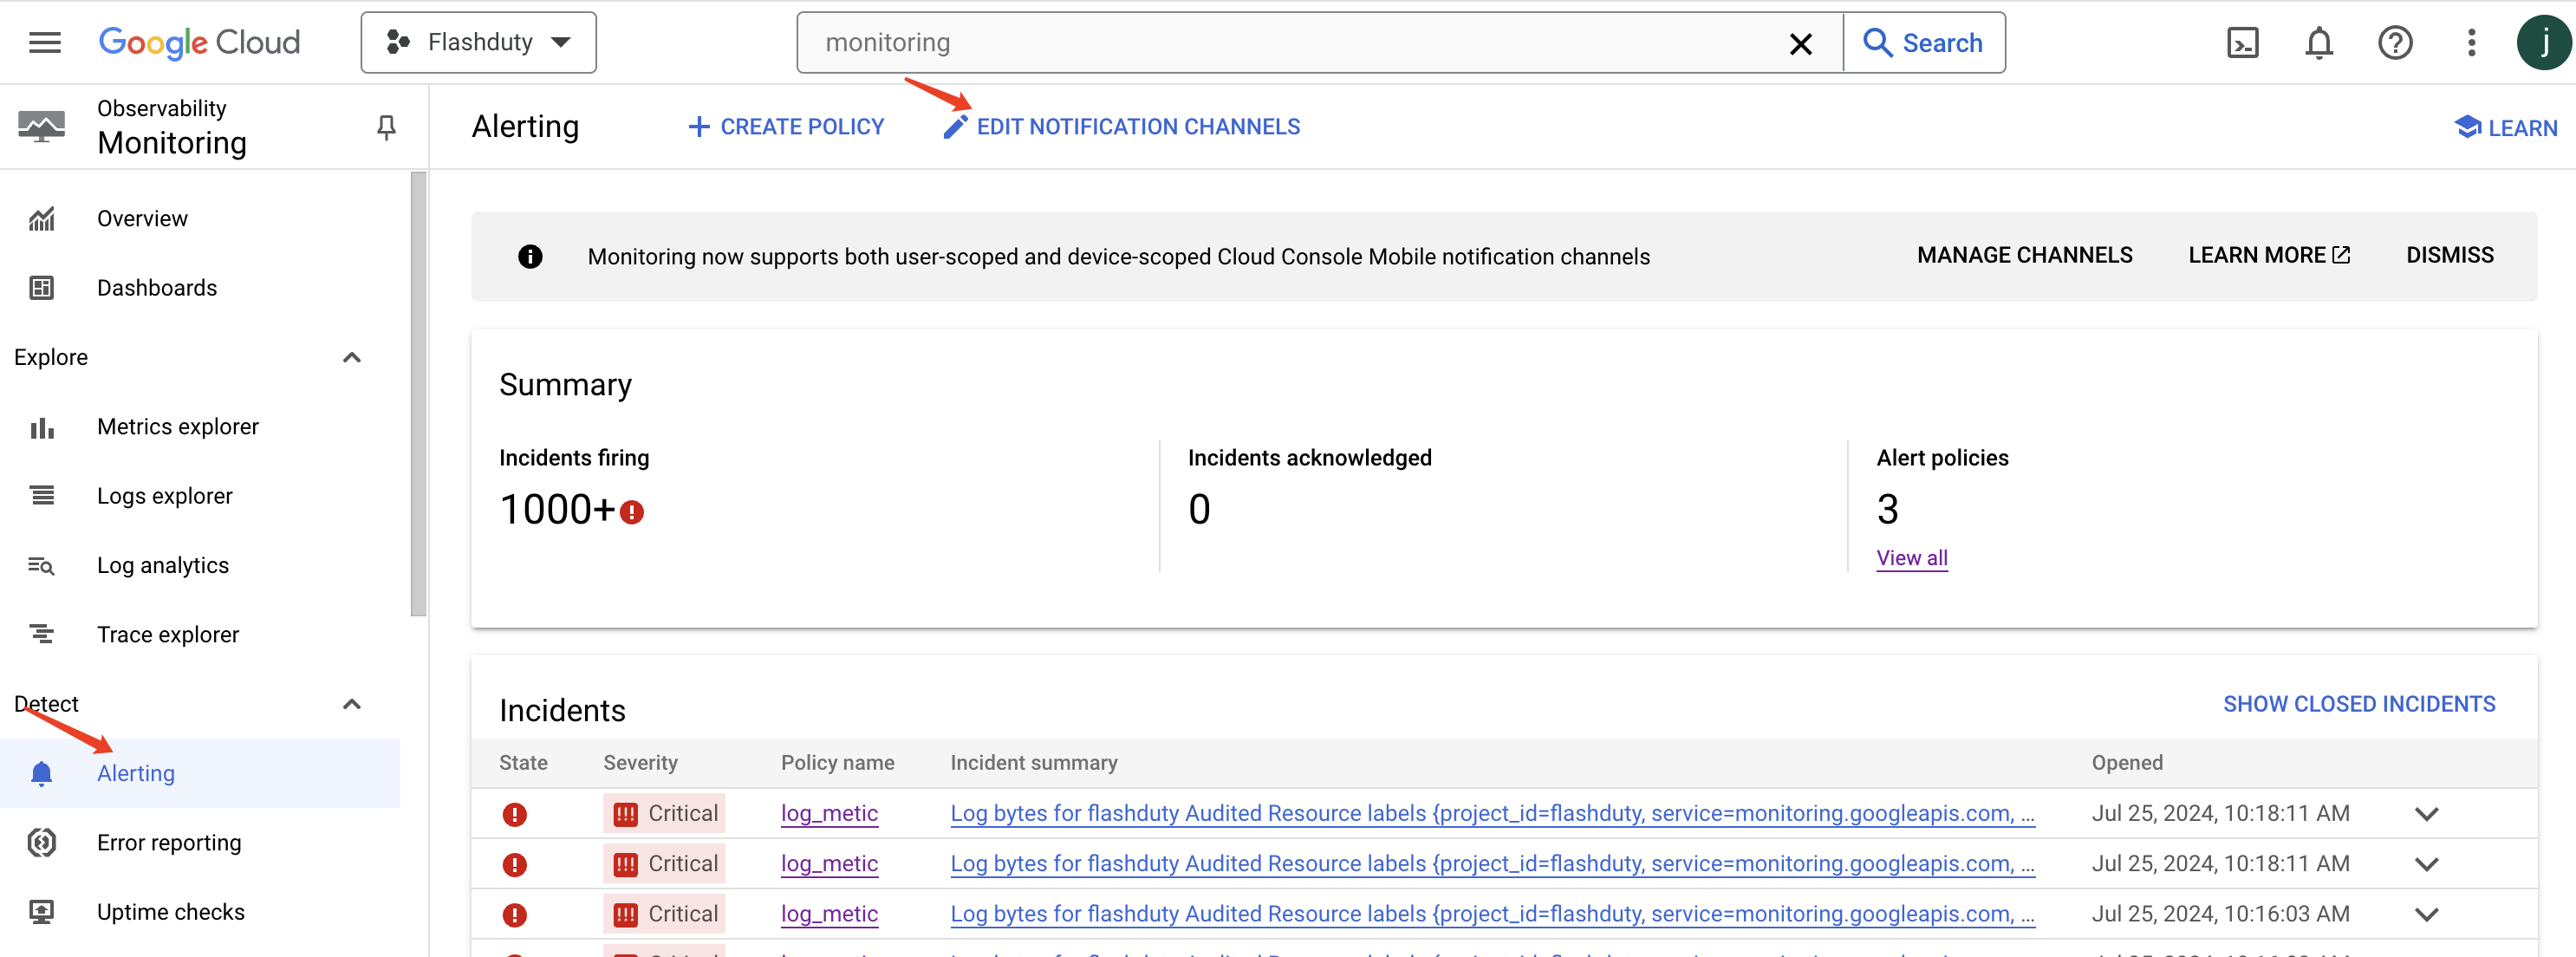
1. Log in to the Google Cloud Console, search for the `Monitoring` product, and enter its console
2. Find `Alerting` in the left menu and click `EDIT NOTIFICATION CHANNELS` to create a channel
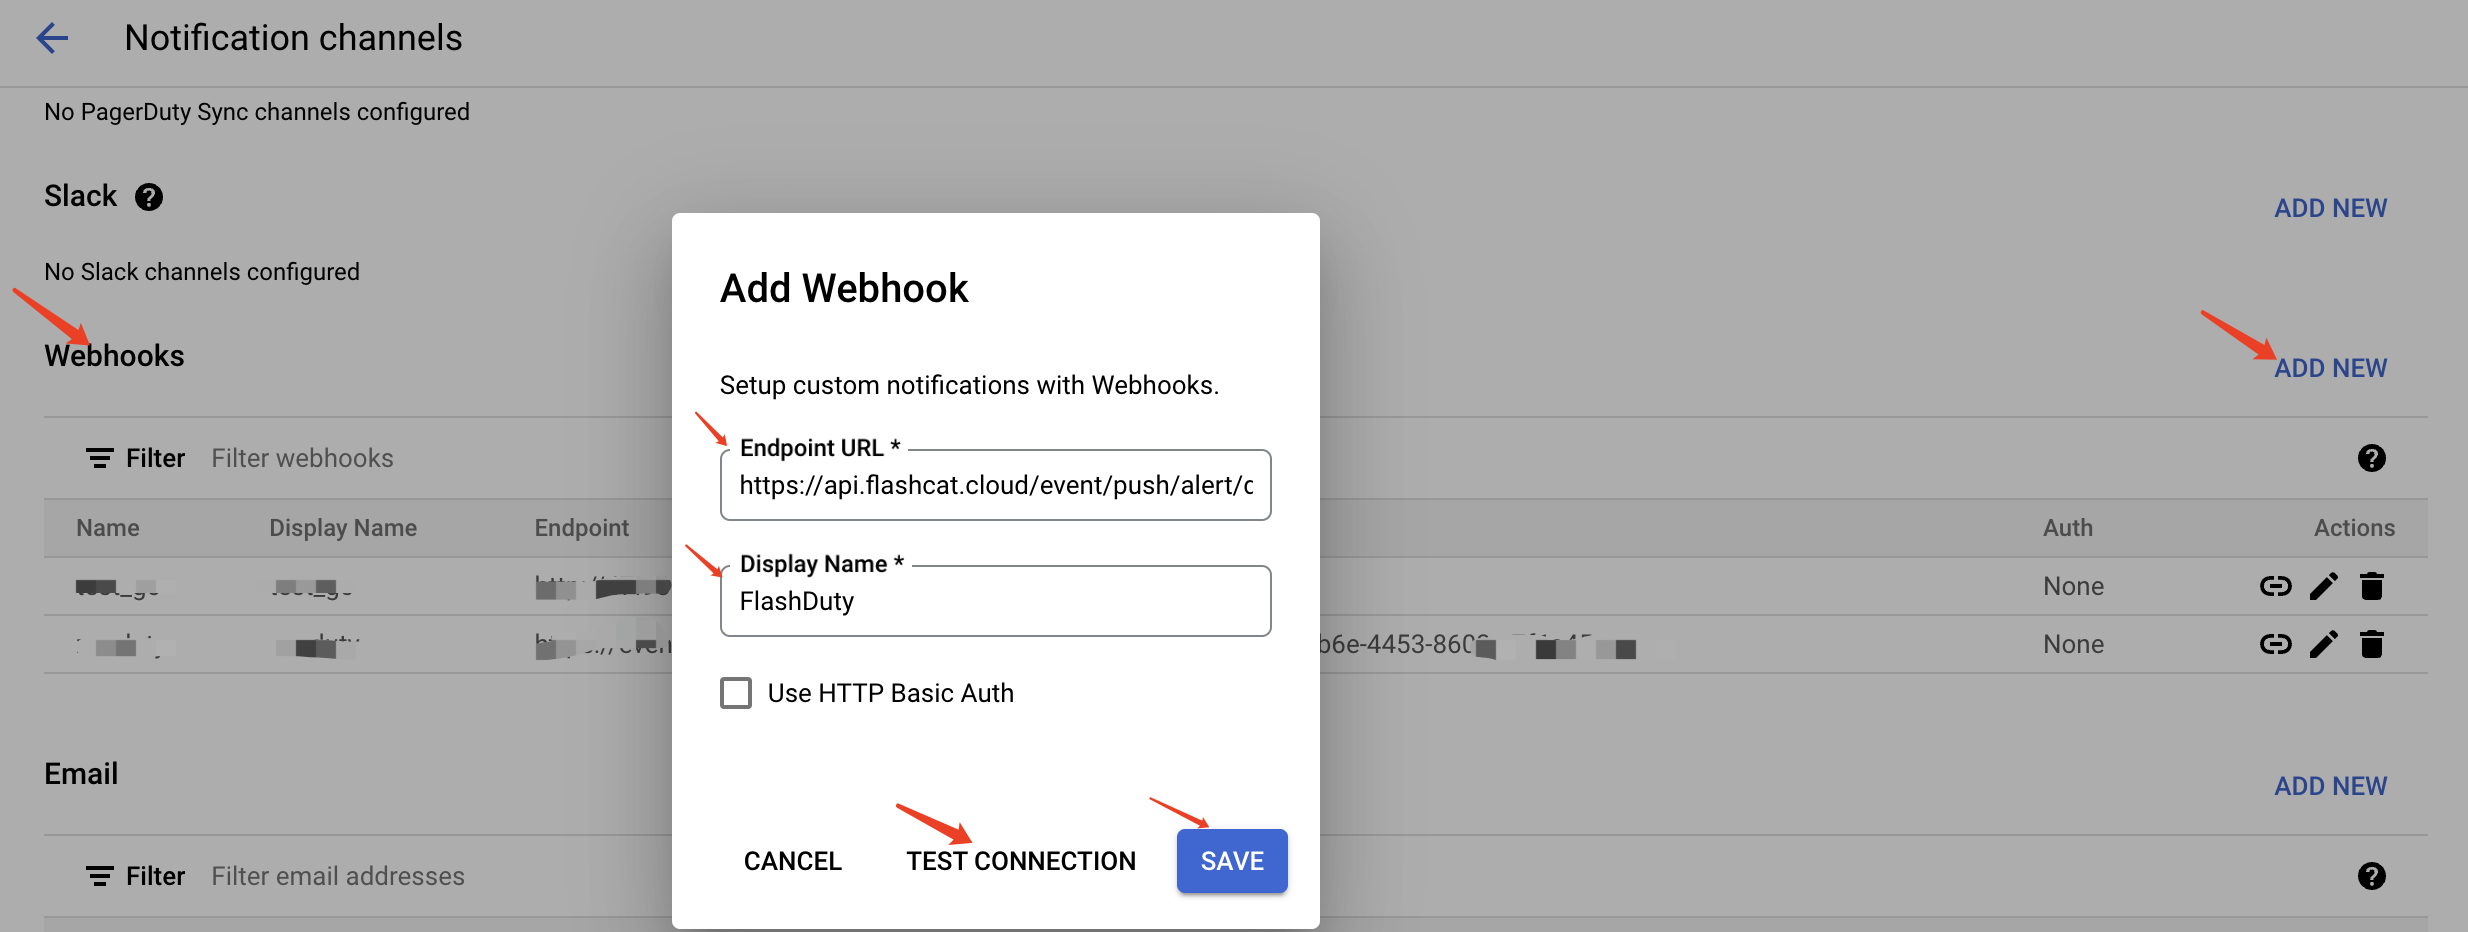
3. Find `Webhooks` on the Notification channels page and click `ADD NEW`
4. Enter the integration push URL in the `Endpoint URL` field (the URL will be generated after saving the integration name on the current page)
5. Enter **Flashduty** in the `Display Name` field
6. Click `TEST CONNECTION` and then `SAVE` to complete
### Step 2: Use Flashduty Alert Channel in Alert Policy
1. Return to the `Alerting` page
2. Create or edit an existing policy
3. Skip other policy configurations (configure alert conditions according to business requirements)
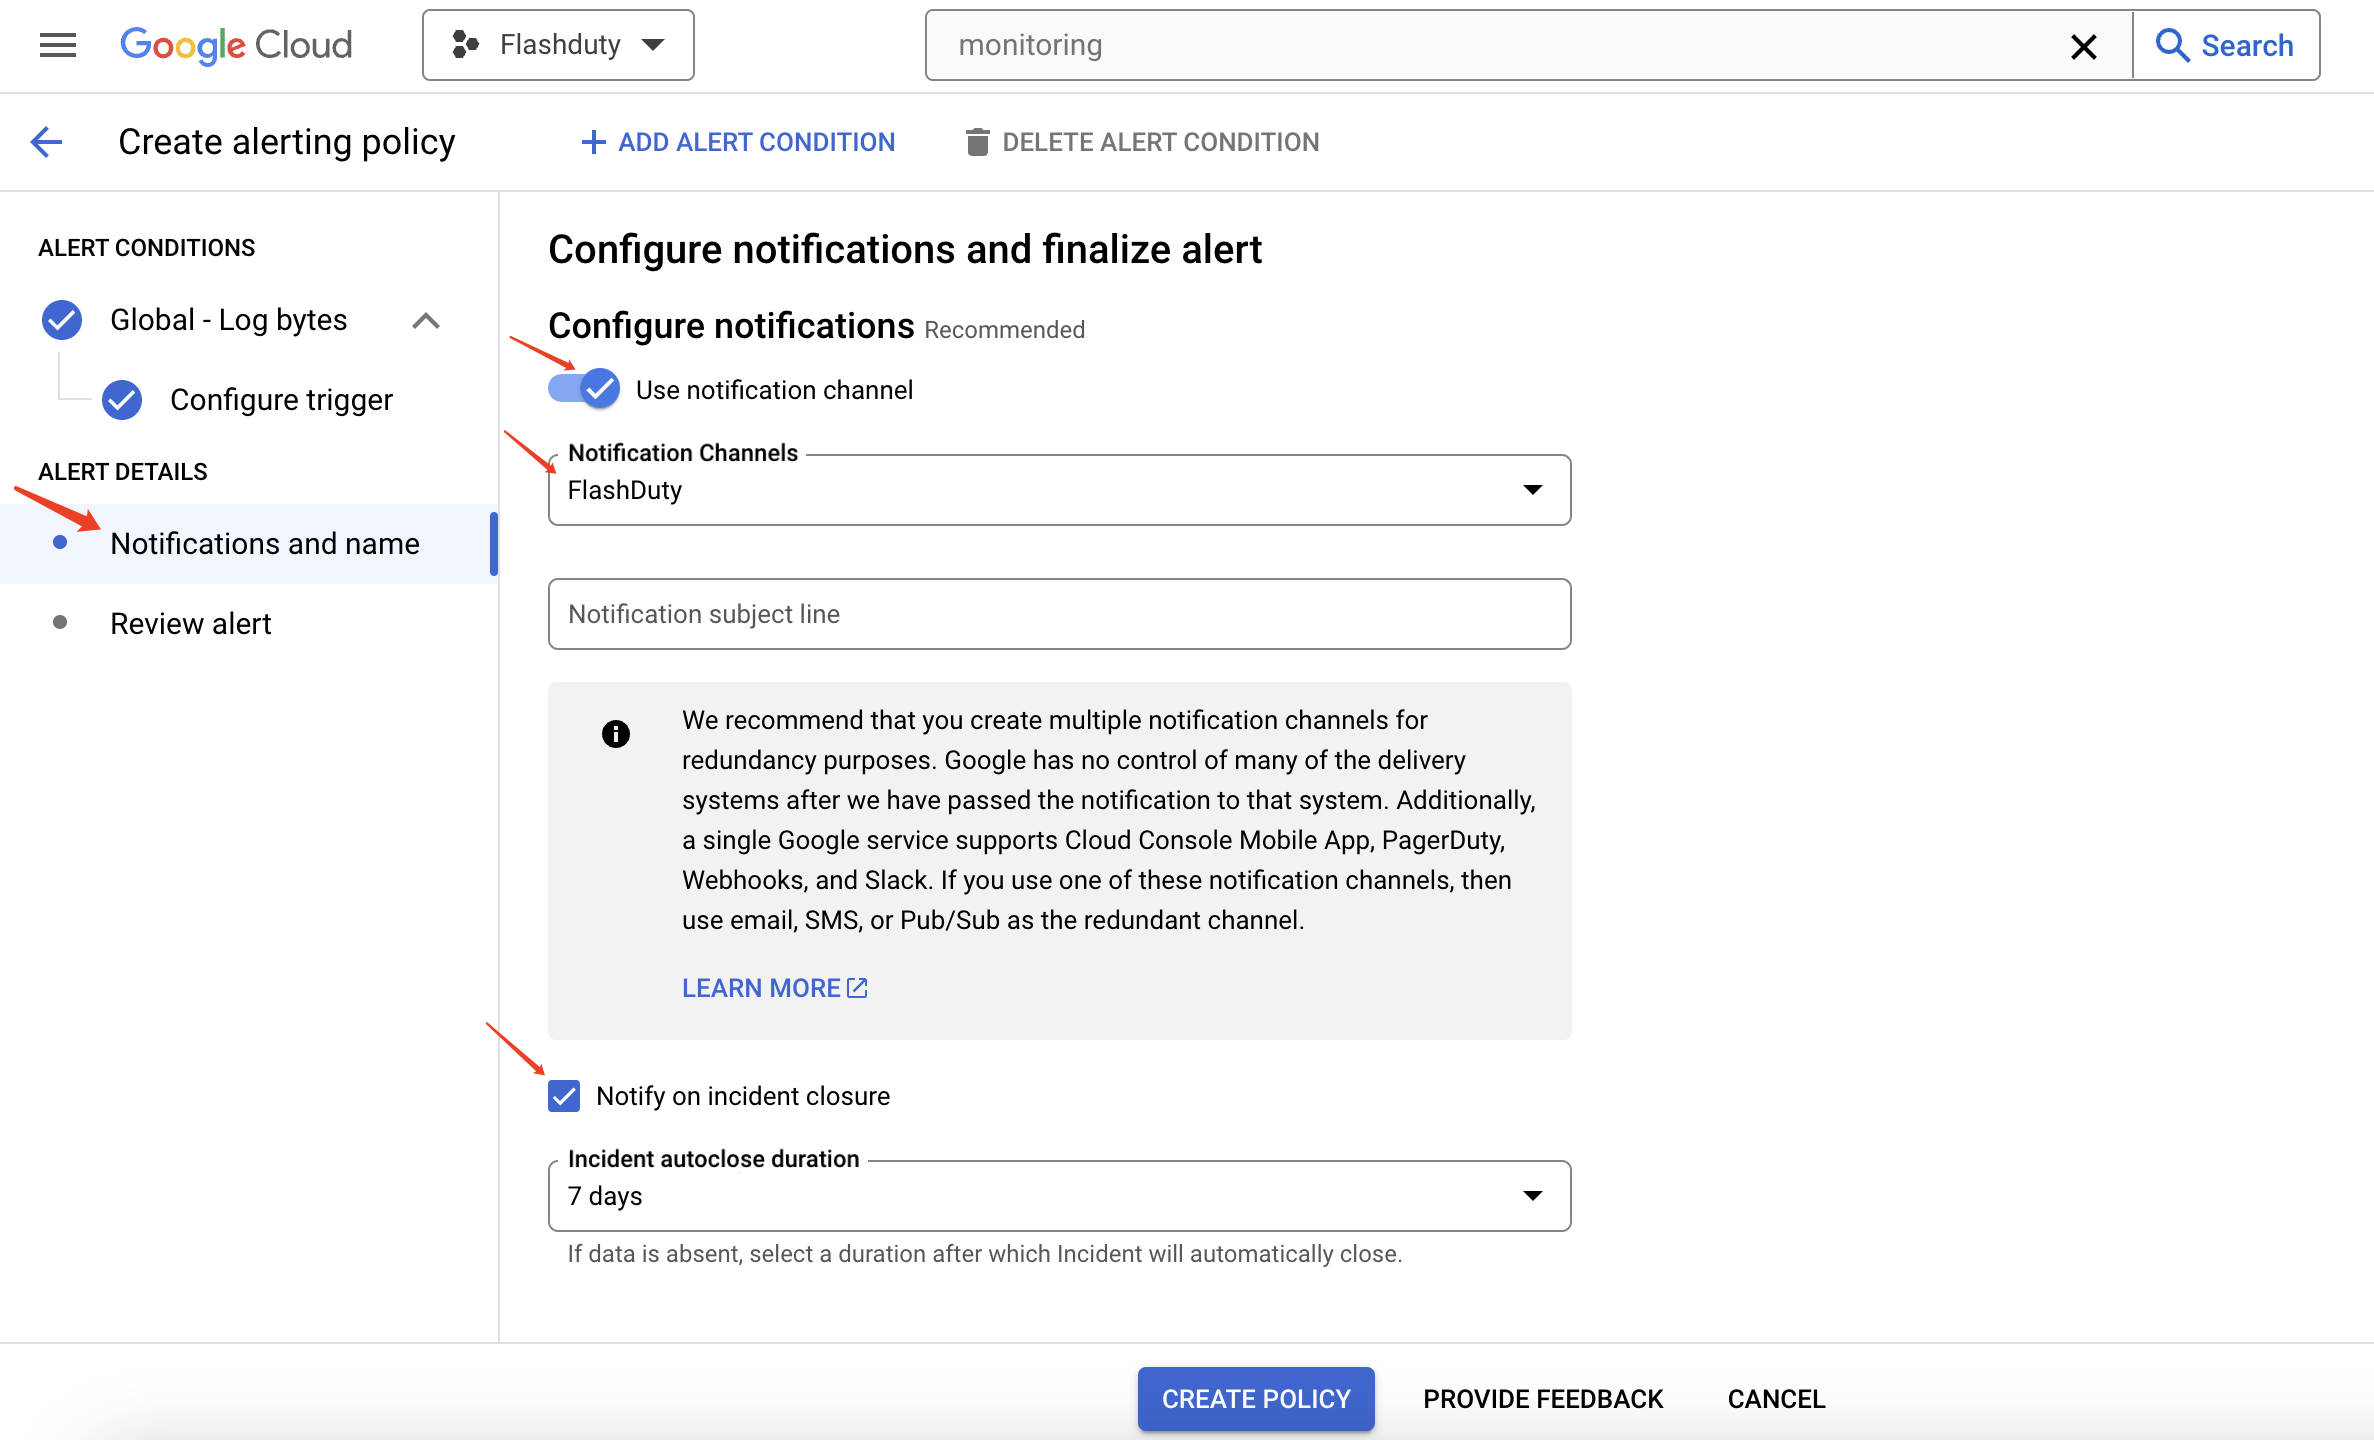
4. On the `Notifications and name` page, keep `Use notification channel` enabled
5. Select the **Flashduty** channel created in **Step 1** from the `Notification channels` dropdown, and check `Notify on incident closure`
6. Complete other configurations and save the policy
| Google Cloud Monitoring | Flashduty | Status |
| ----------------------- | --------- | -------- |
| Critical | Critical | Critical |
| Error | Warning | Warning |
| Warning | Warning | Warning |
| No severity | Info | Info |