## In Flashduty
***
You can obtain an integration push URL through either of these two methods:
### Using Private Integration
Choose this simpler option when you don't need to route alert events to different channels.
Expand
1. Go to the Flashduty console, select **Channel**, and enter a specific channel's details page
2. Select the **Integrations** tab, click **Add Integration** to enter the integration page
3. Choose **SolarWinds** integration, click **Save** to generate a card
4. Click the generated card to view the **push URL**, copy it for later use, and you're done
### Using Shared Integration
Choose this option when you need to route alerts to different channels based on the alert event payload.
Expand
1. Go to the Flashduty console, select **Integration Center=>Alert Events** to enter the integration selection page
2. Select **SolarWinds** integration:
* **Integration Name**: Define a name for this integration
3. Configure the default route and select the corresponding channel (after the integration is created, you can go to `Route` to configure more routing rules)
4. Click **Save** and copy the newly generated **push URL** for later use
5. Done
## In SolarWinds
***
## I. SolarWinds Alert Push Configuration
### Step 1: Configure Flashduty Alert Channel
**Prerequisites**
1. SolarWinds has five types of alerts (Anomaly, Entity, Event, Log, Metric Group), each requiring a different alert channel, so five alert channels need to be created
2. When creating Webhook channels, it's recommended to name them using the format: Type\_Flashduty, for example: Anomaly\_Flashduty
3. When selecting **Select Custom Body Template Based On The Alert Types**, the system will generate a default **HTTP POST Body**. **Please do not modify the generated template content**
**Getting Started**
1. Log in to your SolarWinds console
2. Find `Settings` in the left navigation bar, select `Notification Services` and click `Webhook` to enter the new alert channel page
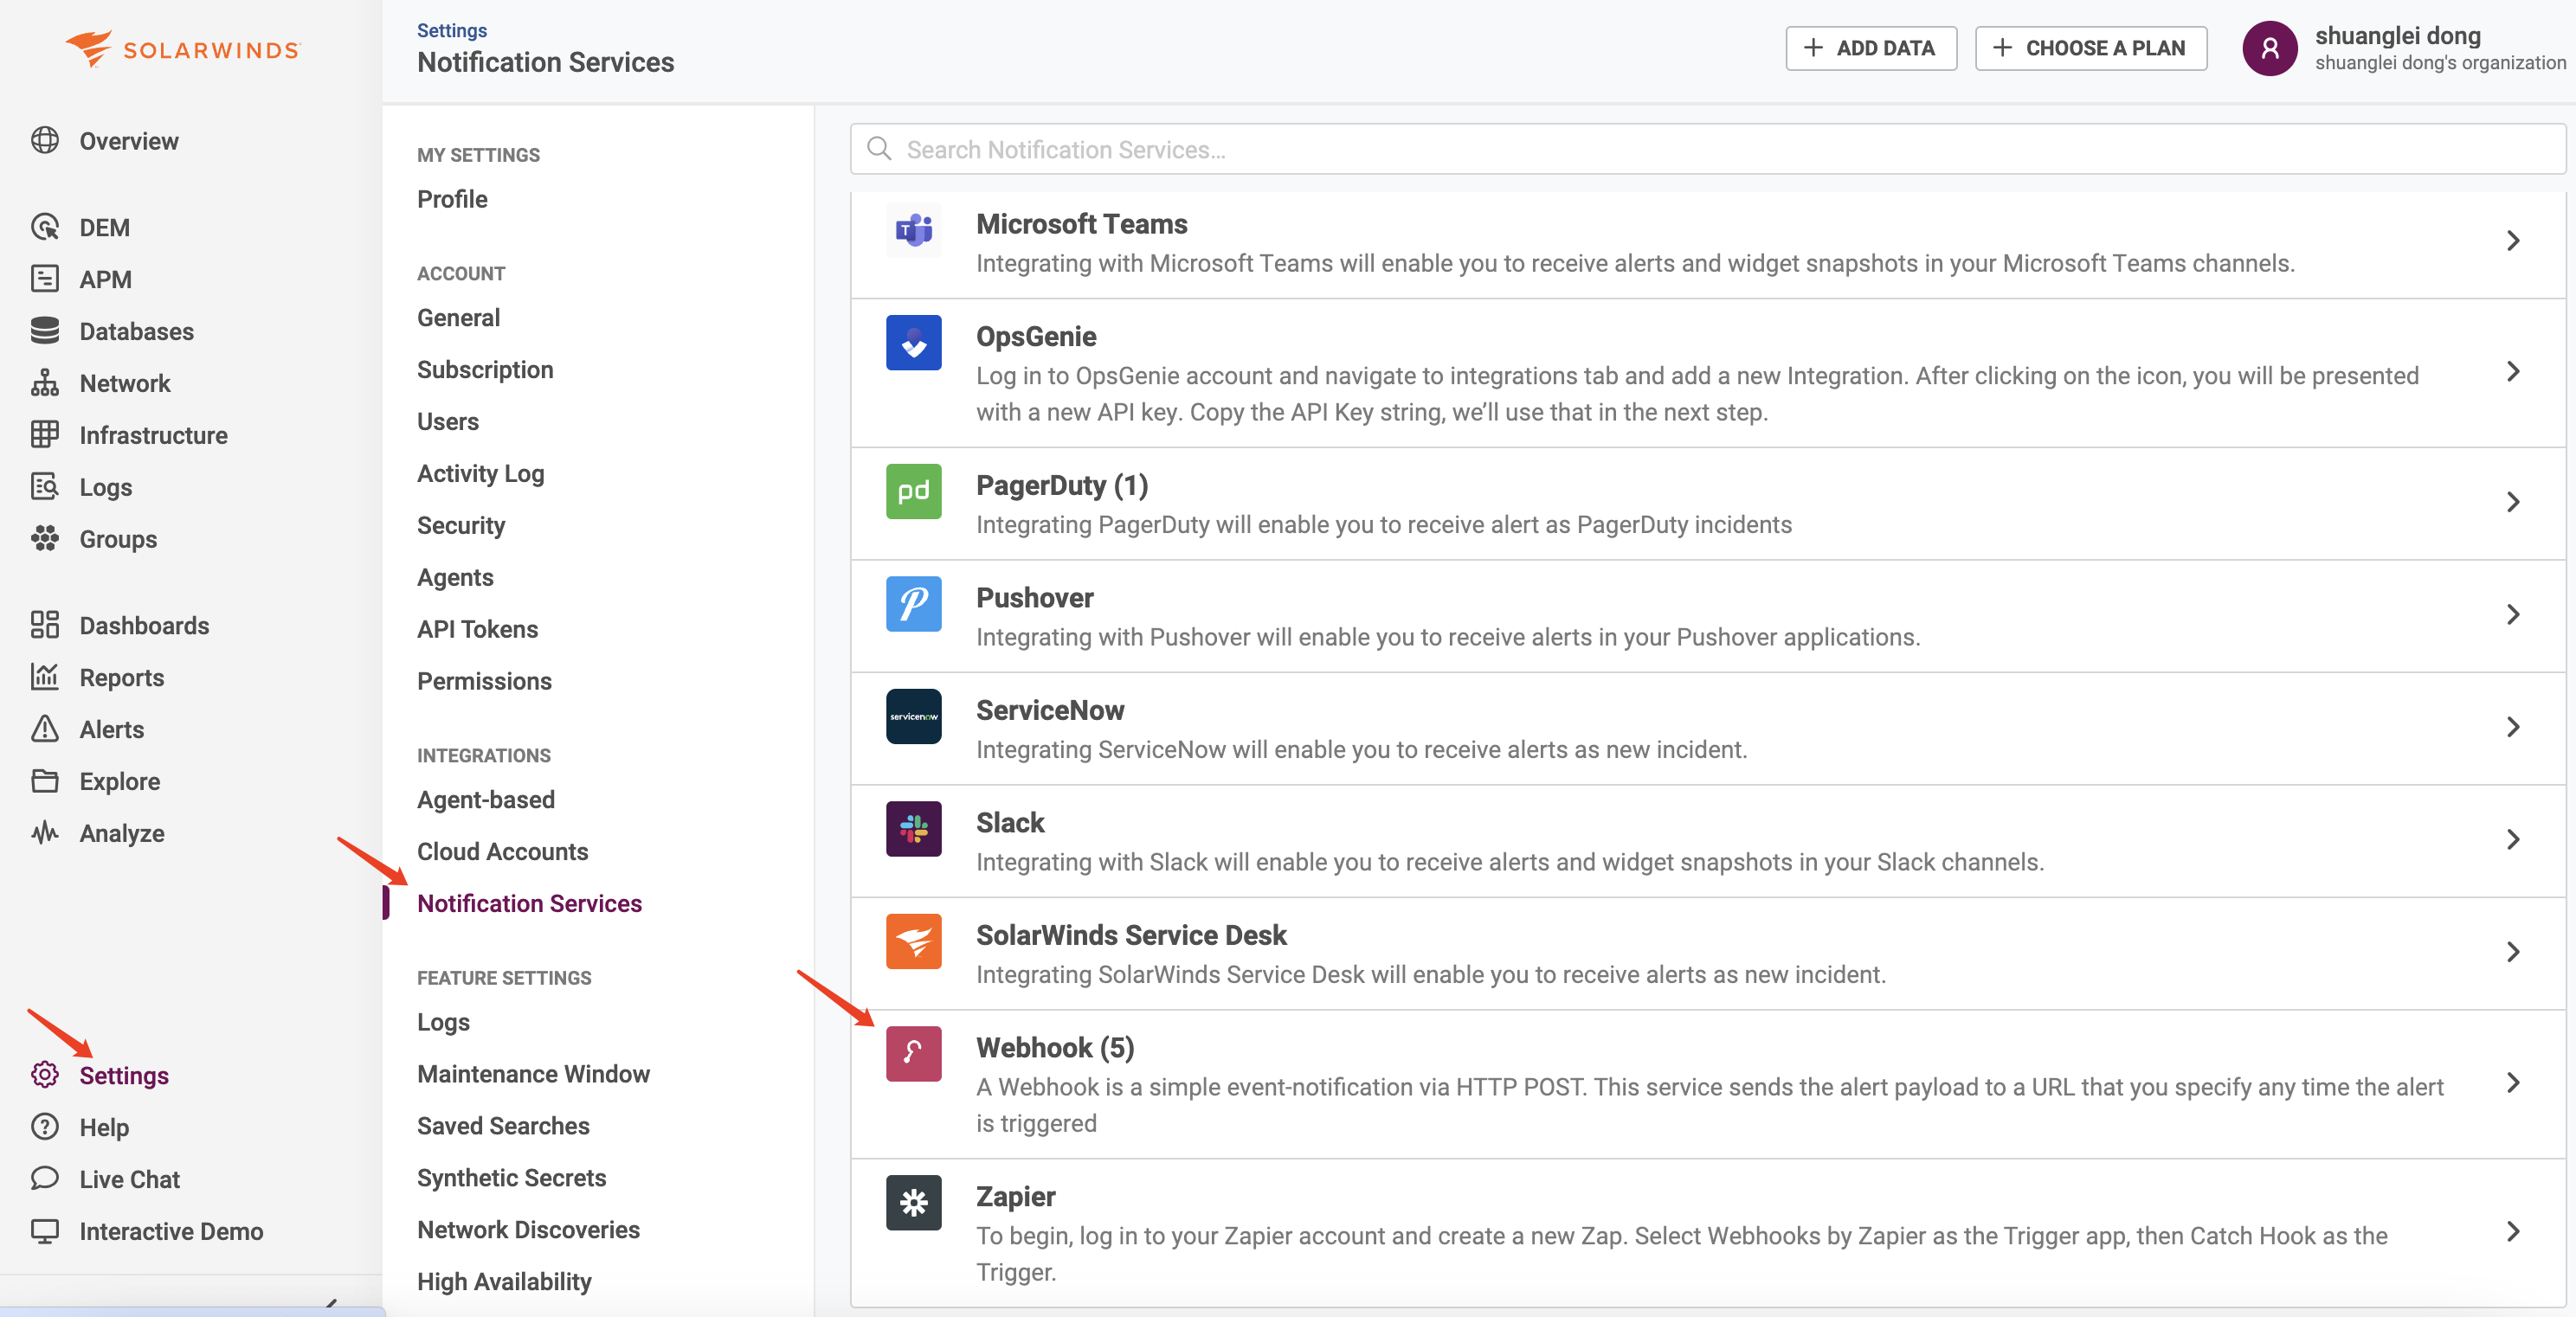
3. Click `CREATE CONFIGURATION` to create the corresponding alert channel
4. Select **POST** for `Method`, name it according to the prerequisites, e.g., Anomaly\_Flashduty
5. Fill in the integration push URL in `Destination URL` (enter the integration name on the current page, save to generate the URL)
6. Select **application/json** for `Content Type`
7. Choose the type you need to create in `Select Custom Body Template Based On The Alert Types`, e.g., Anomaly Based Alert
8. Leave `HTTP POST Body` unchanged, use the system-generated default
9. Click `CREATE` to save after configuration
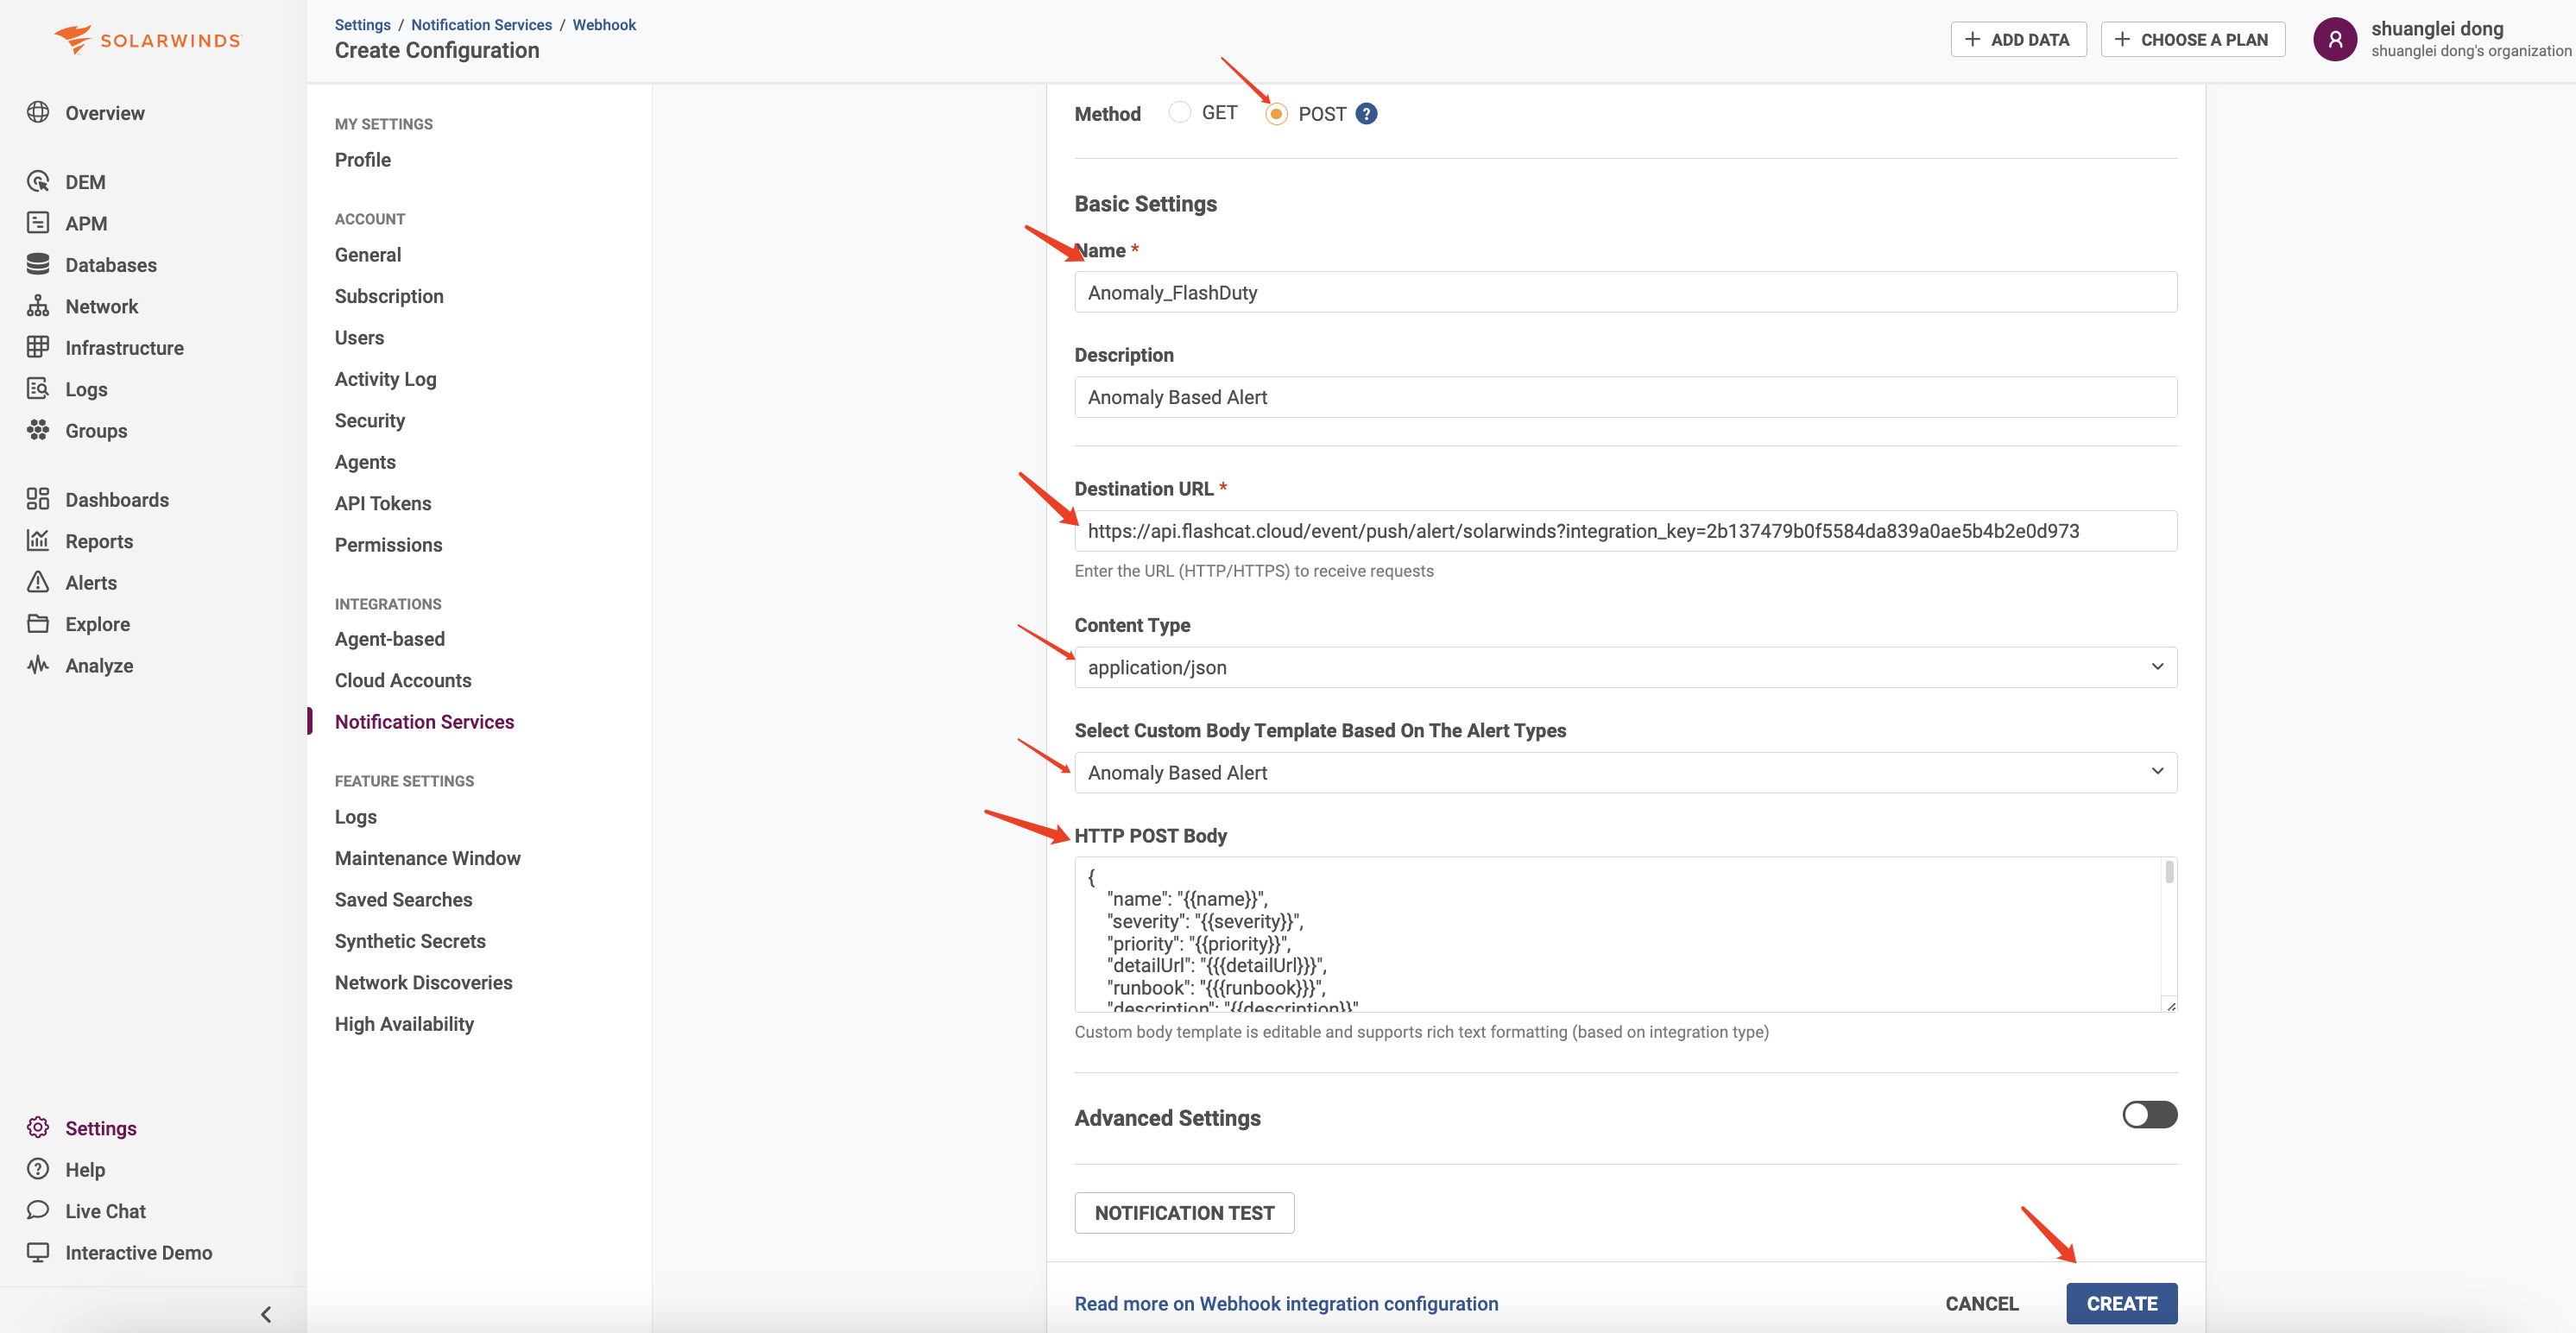
10. Repeat the above steps to create other types of Webhook channels as needed
### Step 2: Use the Alert Channel Created in Step 1 in Alert Policies
1. Find `Alerts` in the left navigation bar, select `Alert Settings`
2. Create or edit existing policies (configure alert rules as needed, alert rule configuration is omitted here)
3. In the `Actions` section of the policy configuration page, select **Webhook** for `Services`
4. Select the Anomaly\_Flashduty channel created in Step 1 for `Configuration`
5. Keep `Send an additional notification when the Alert is cleared` enabled
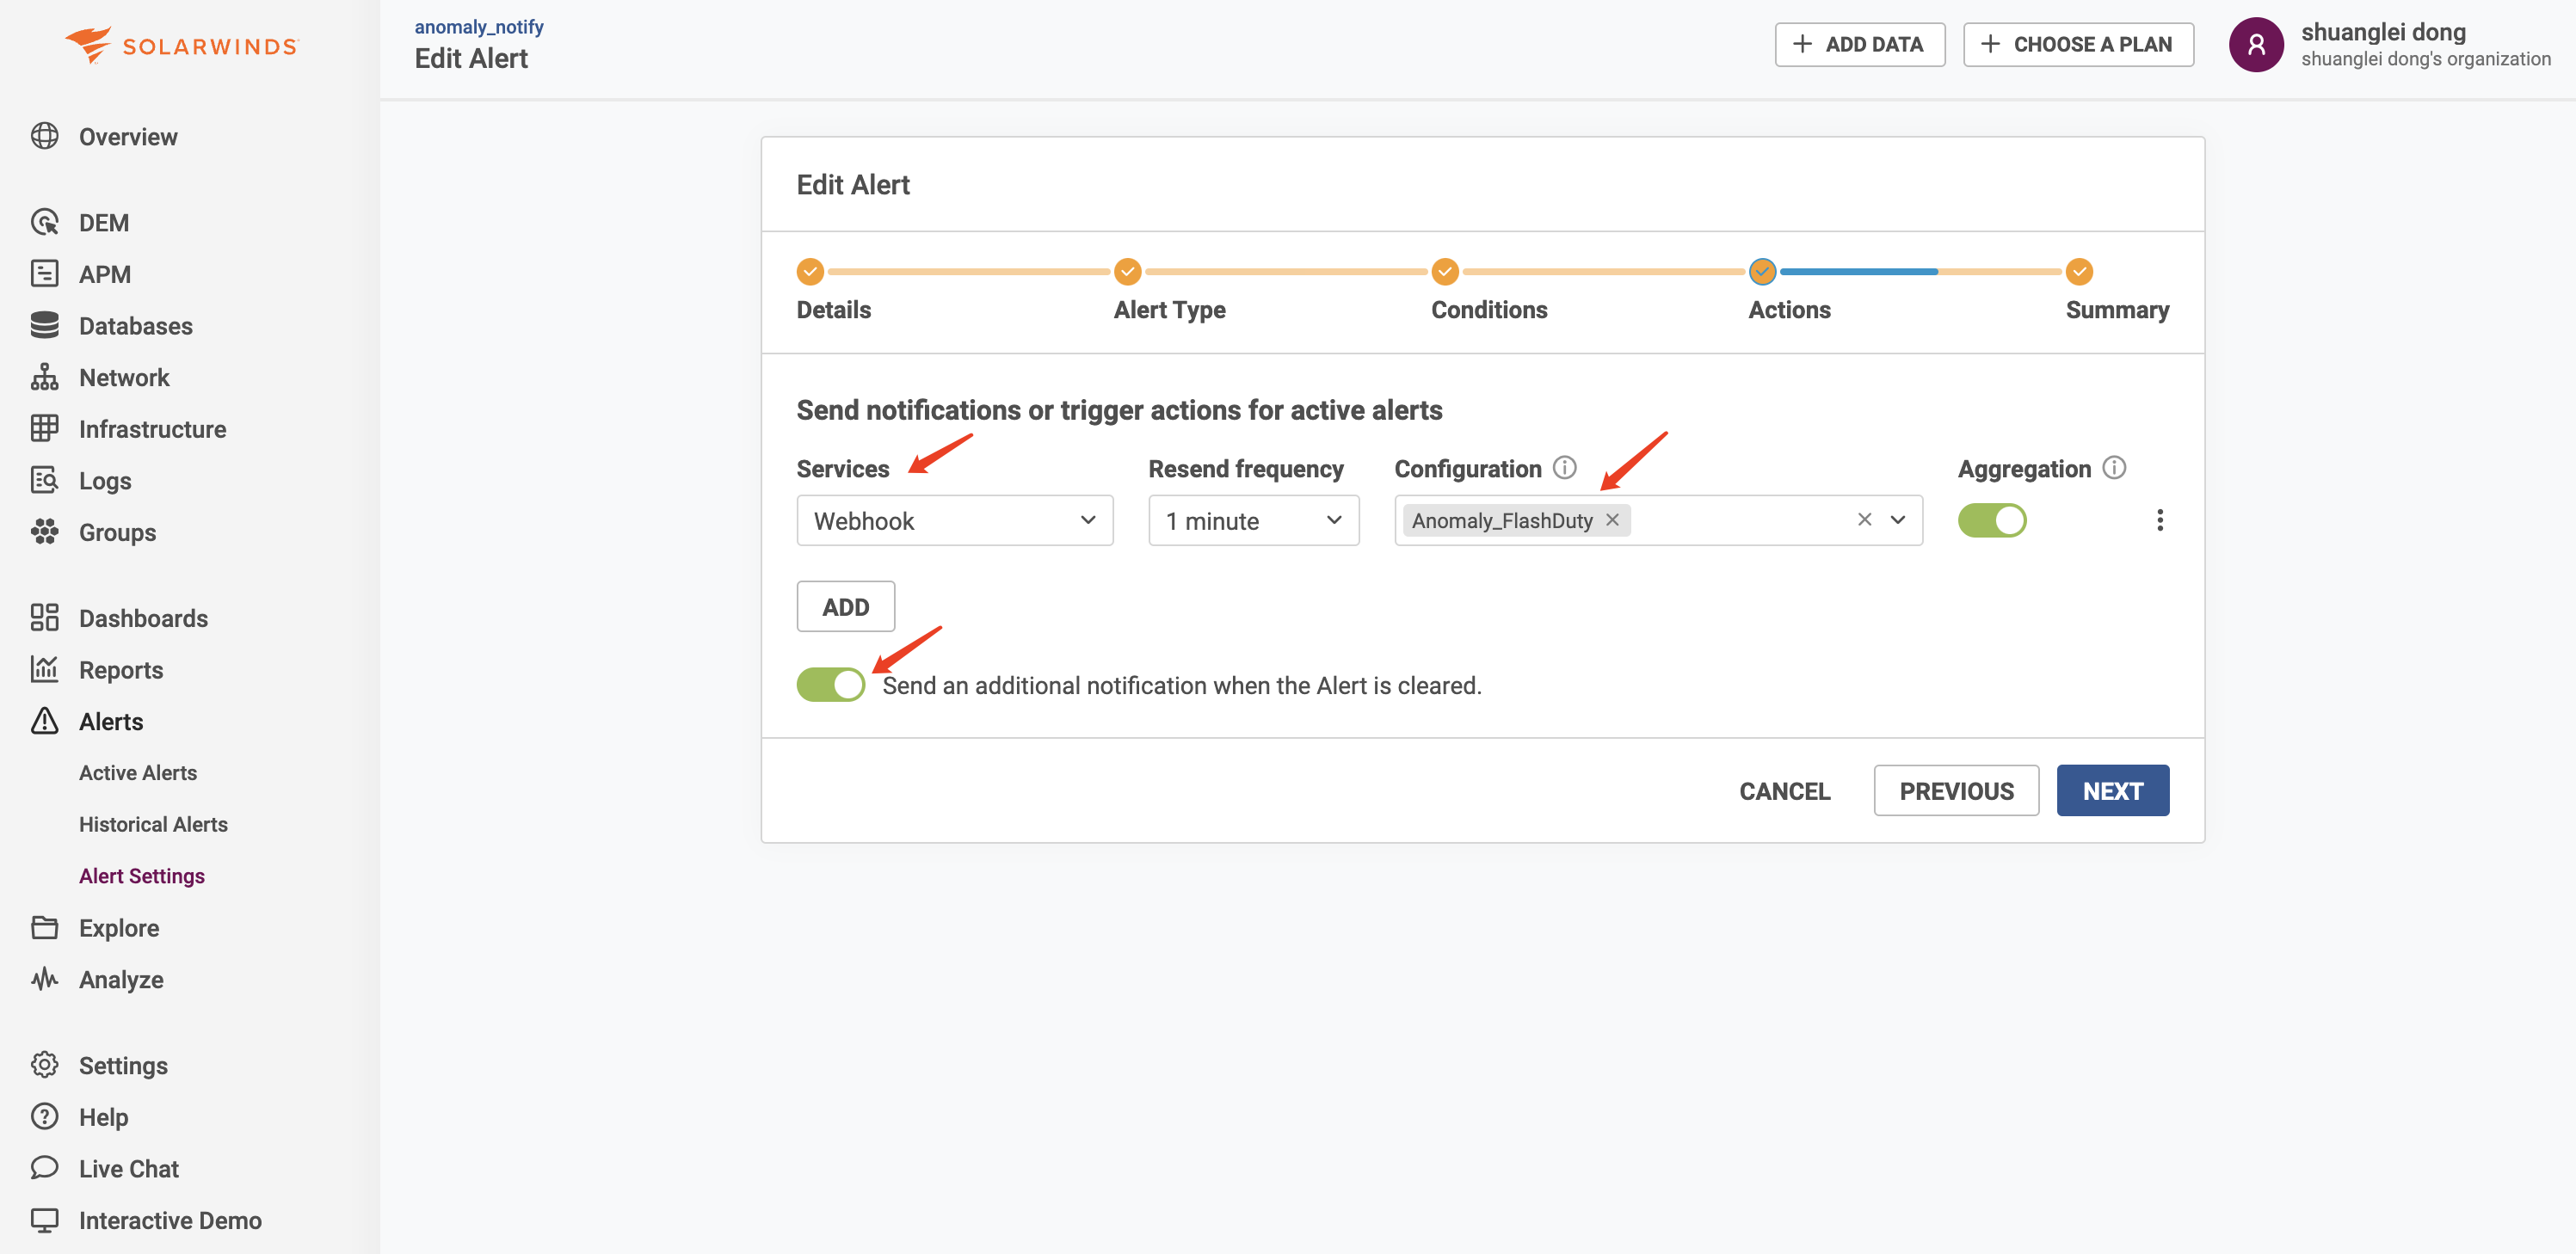
6. Click `Save` after completing other configurations
| SolarWinds | Flashduty | Status |
| ---------- | --------- | -------- |
| Critical | Critical | Critical |
| Warning | Warning | Warning |
| Info | Info | Info |