

This documentation uses the new version of Dingtalk Open Platform as an example.
AI SRE Required Permissions
The following list includes all permissions required when the Dingtalk IM integration uses AI SRE, including basic notifications, War Room, AI SRE conversations, and AI-generated post-mortem reports. In the Dingtalk Open Platform Permission Management page, request each official permission name below.If no Dingtalk AI streaming card template is configured, AI SRE falls back to standard interactive cards or session-webhook bot replies. Keep
qyapi_robot_sendmsg granted in that mode.1. Create Dingtalk App and Add Dingtalk Integration
1. Create Custom App
Visit Dingtalk Developer Console → App Development → Enterprise Internal Development, create an app. See Dingtalk development documentation Create Enterprise Internal App - H5 Mini App.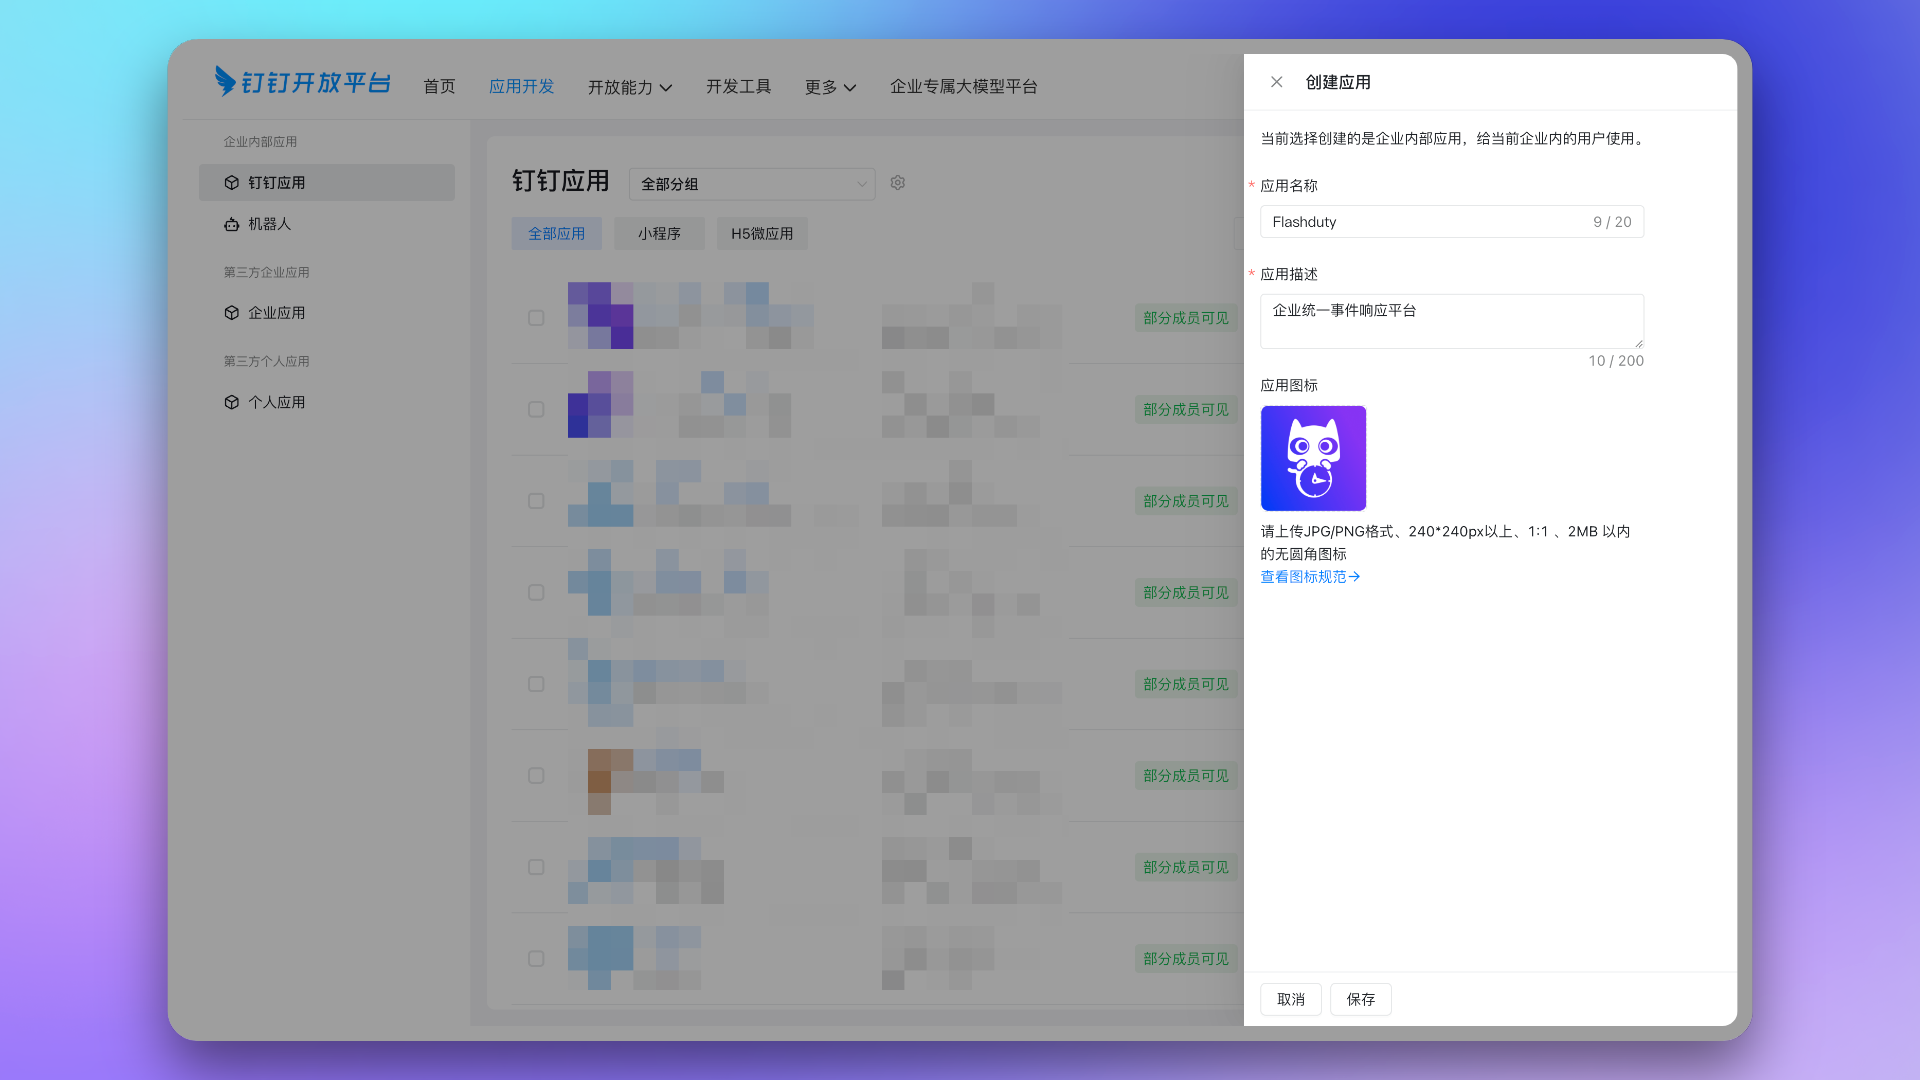 You can use the Flashduty official icon as the app icon.
2. Copy Enterprise CorpId
Click the enterprise avatar in the top right corner, copy CorpId from the dropdown menu.
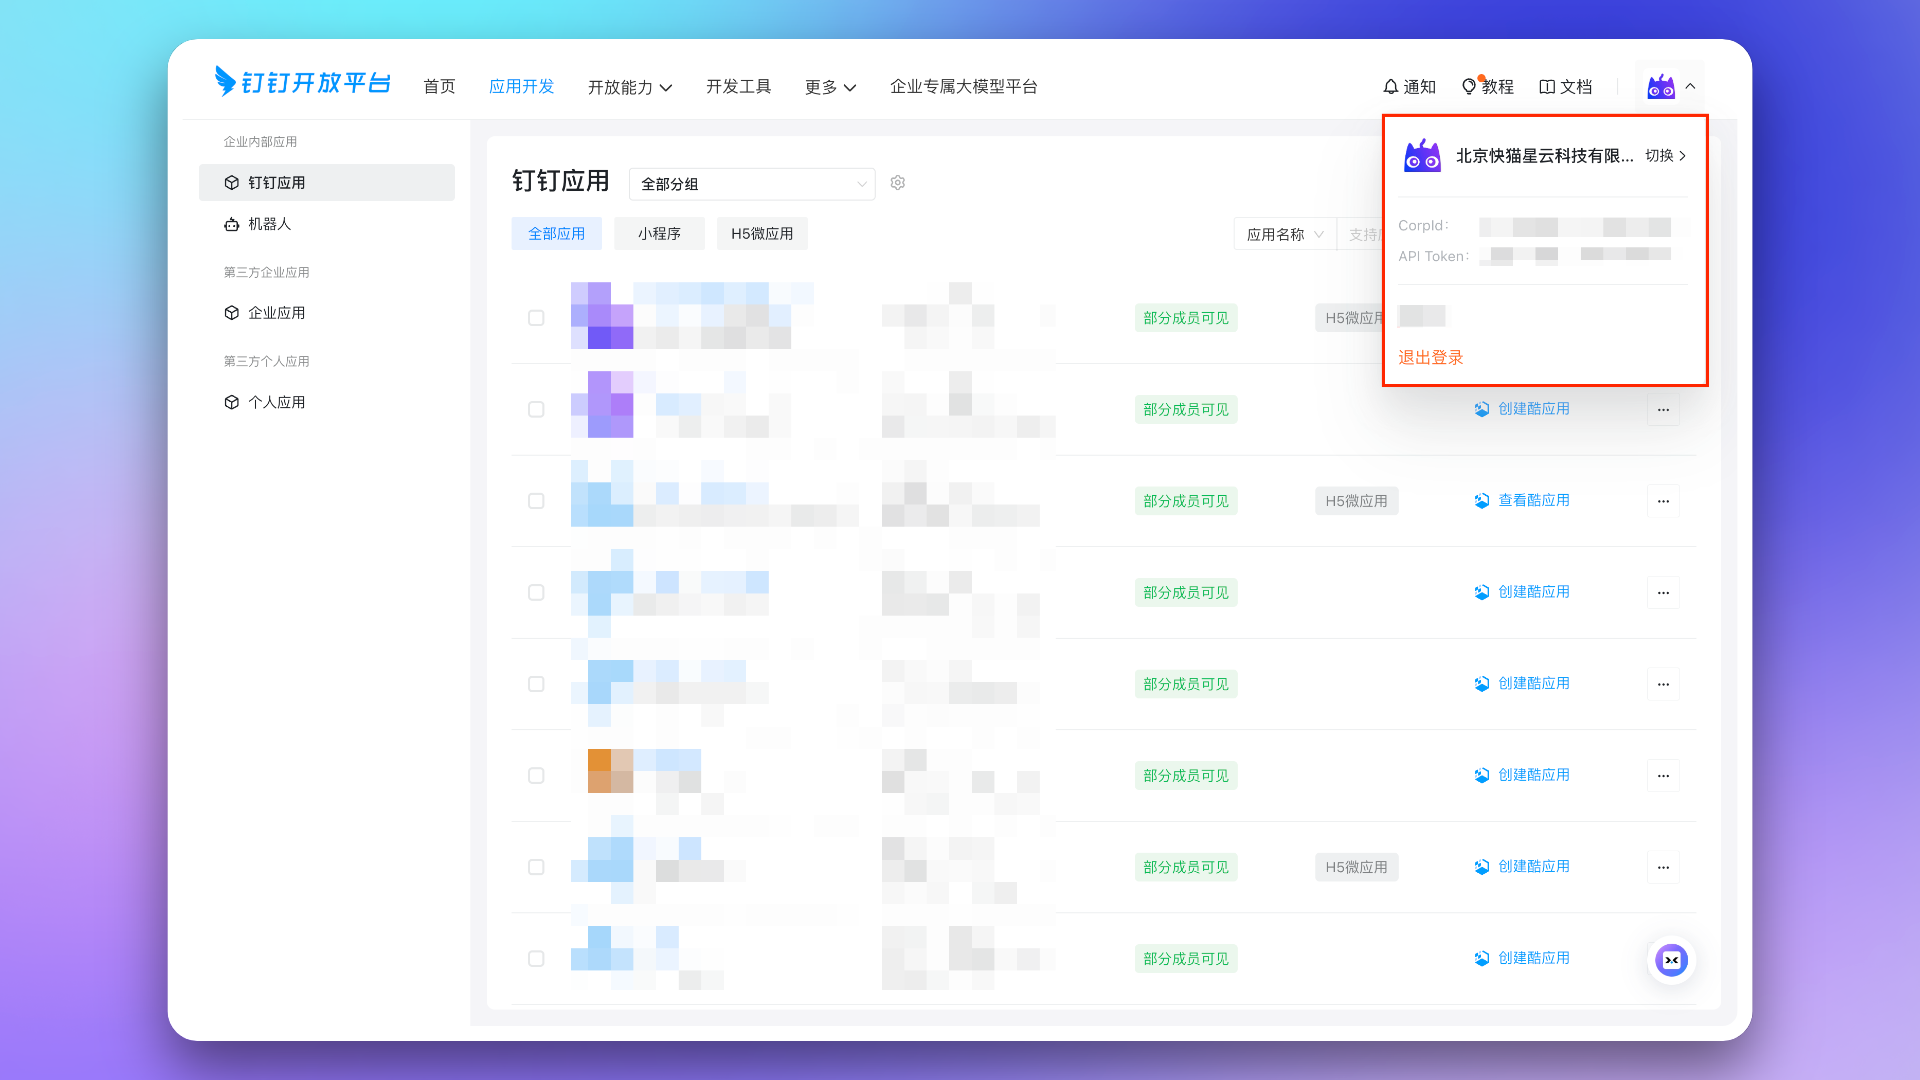 Return to Flashduty On-call integration configuration page, fill in the corresponding
 CorpId in the form.
3. Copy App Credential Information
Enter the created app details page, navigate to App Capabilities → Credentials & Basic Info via the left menu, copyAgentId, Client ID, and Client Secret.
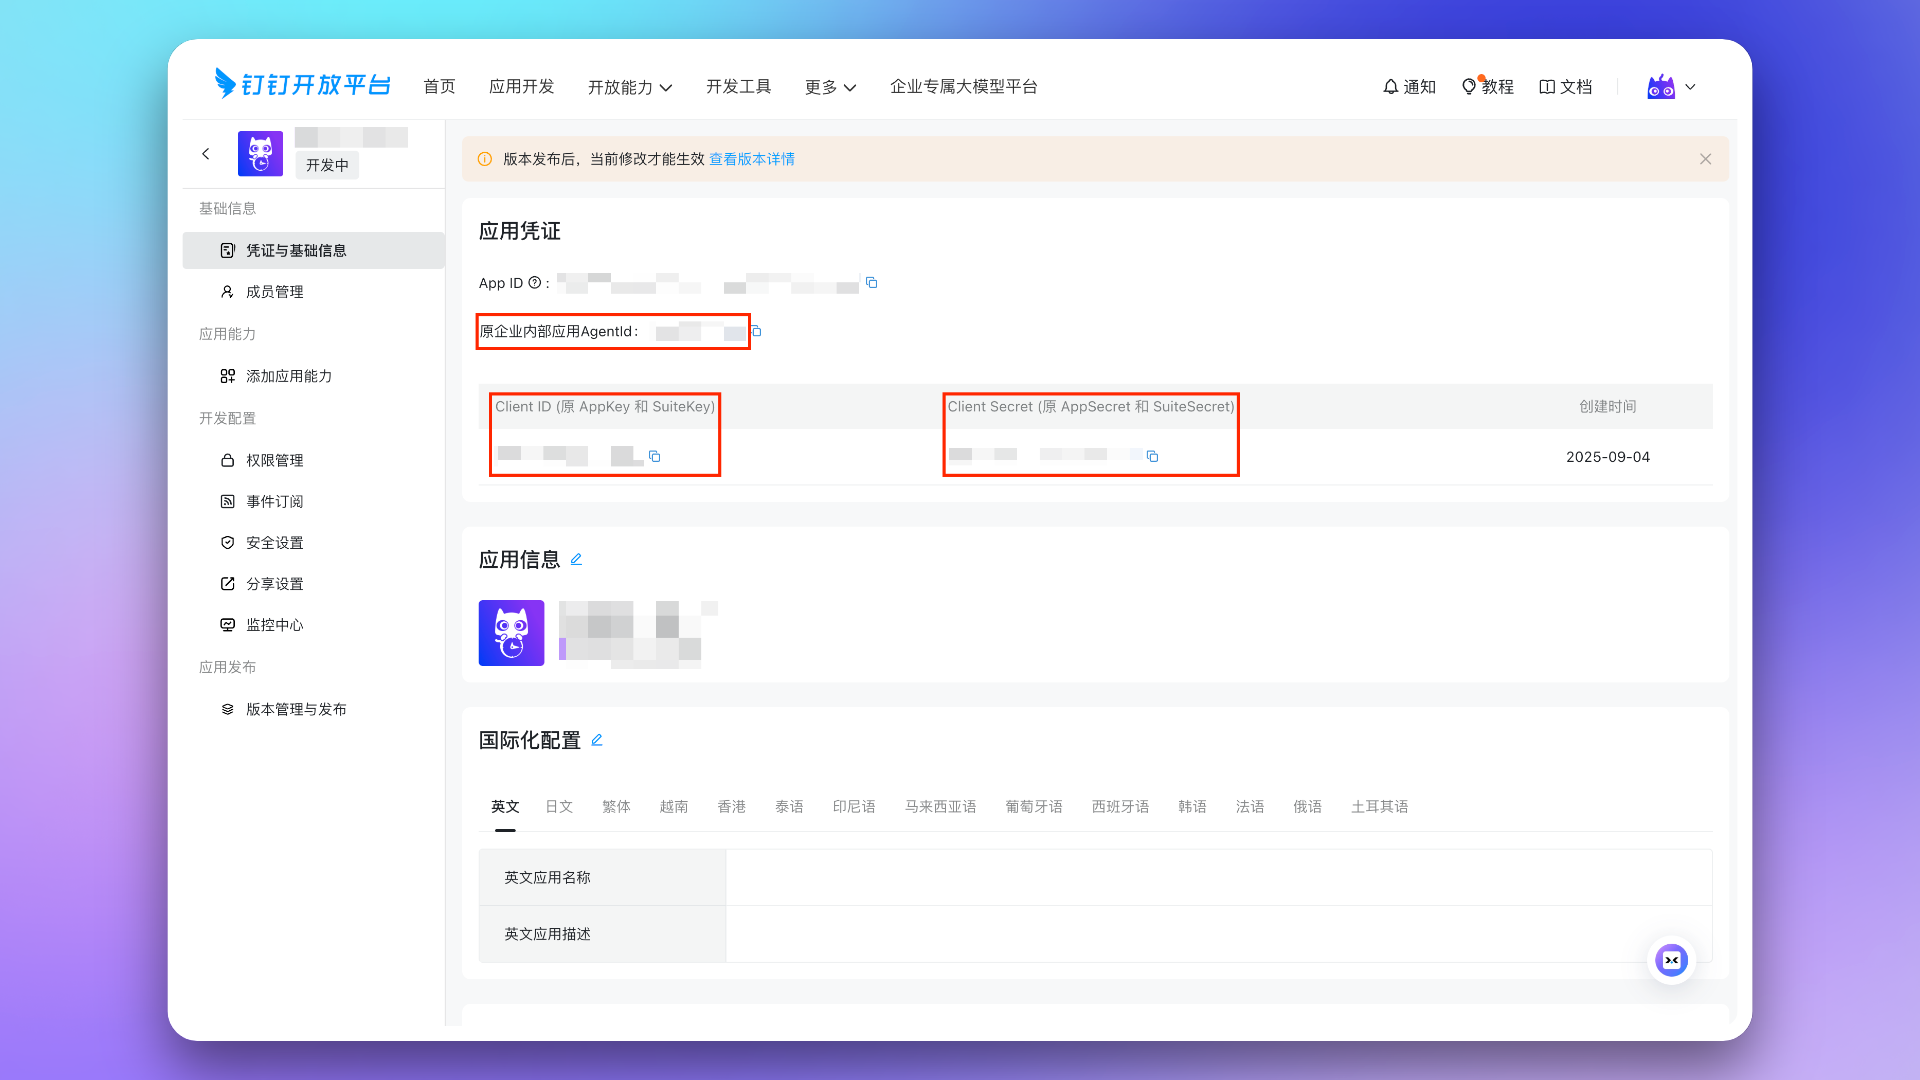 Return to Flashduty On-call integration configuration page, fill in the corresponding
 AgentId, Client ID, and Client Secret in the form.
4. Copy Event Subscription Information
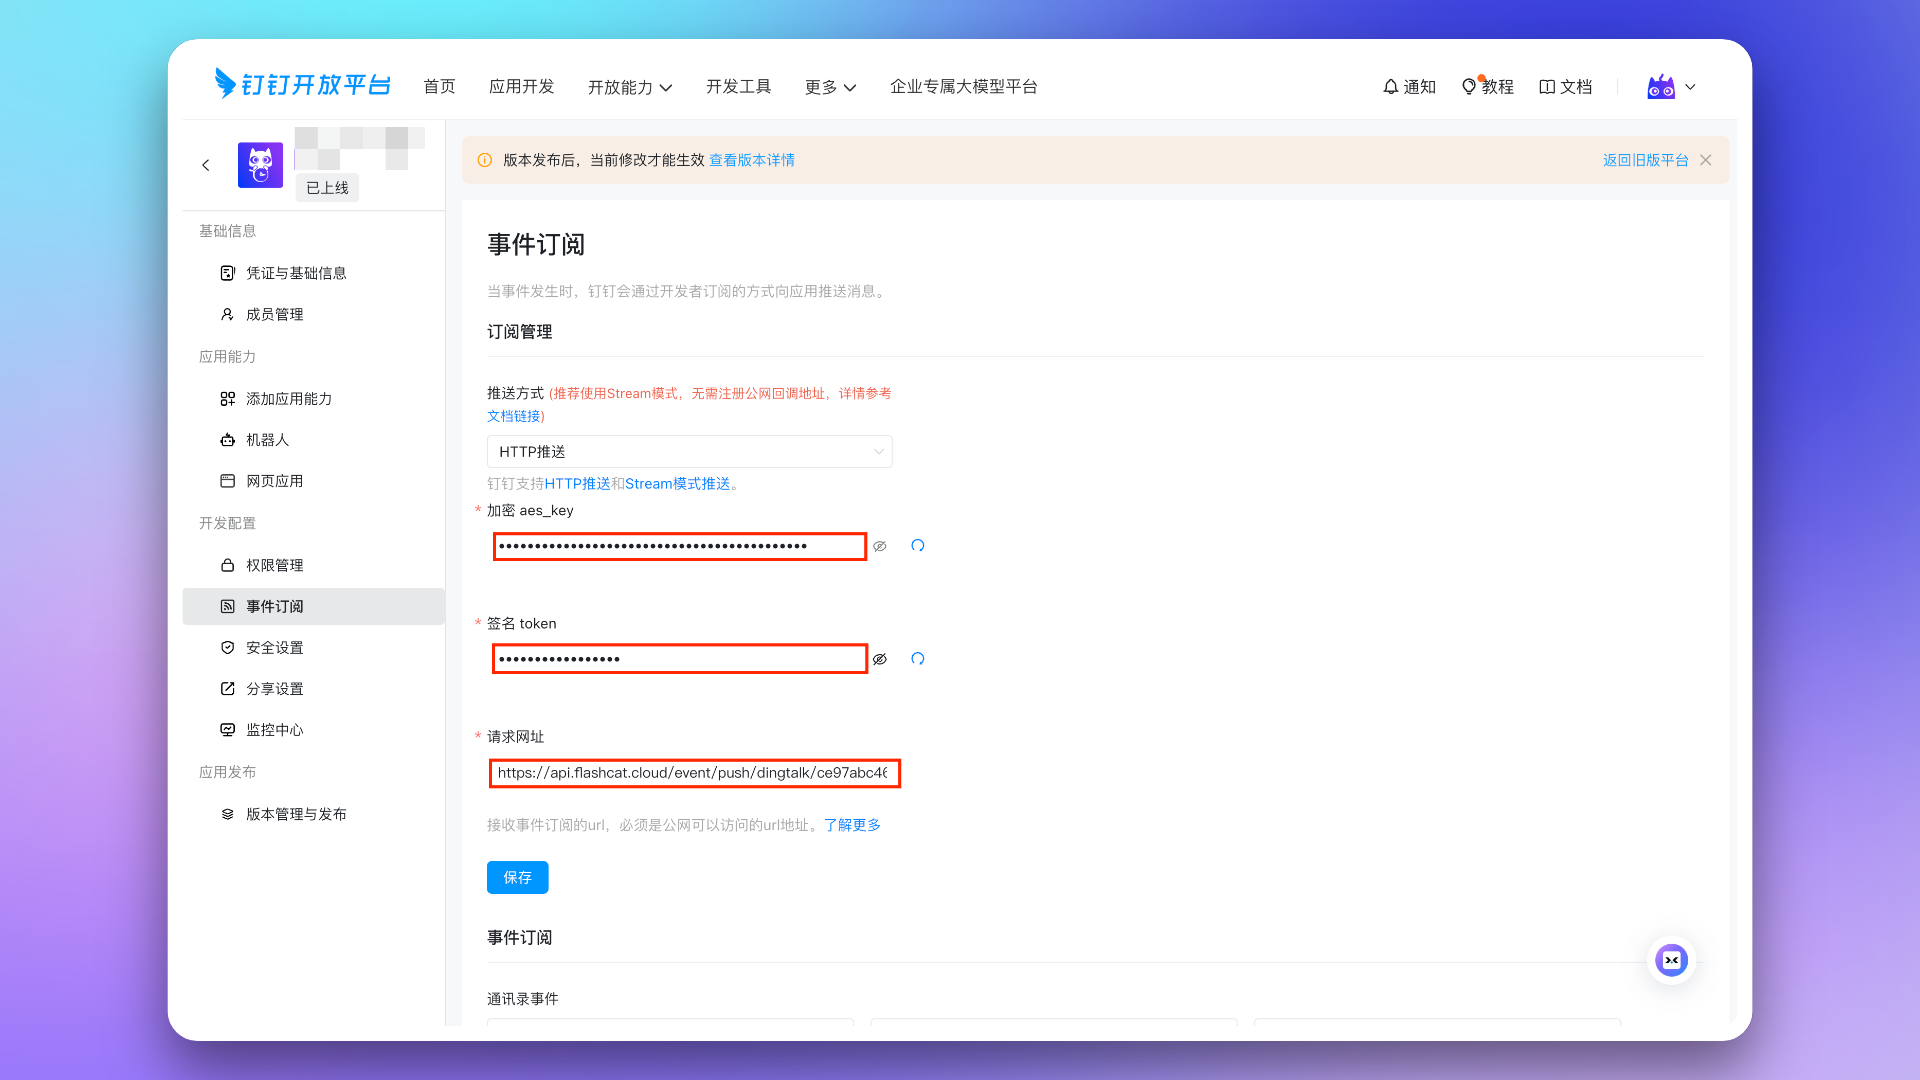
Go to Development Configuration → Events & Callbacks page. Set push method toHTTP Push, then click the button to generate Encryption aes_key and Signature Token, and copy and save them.
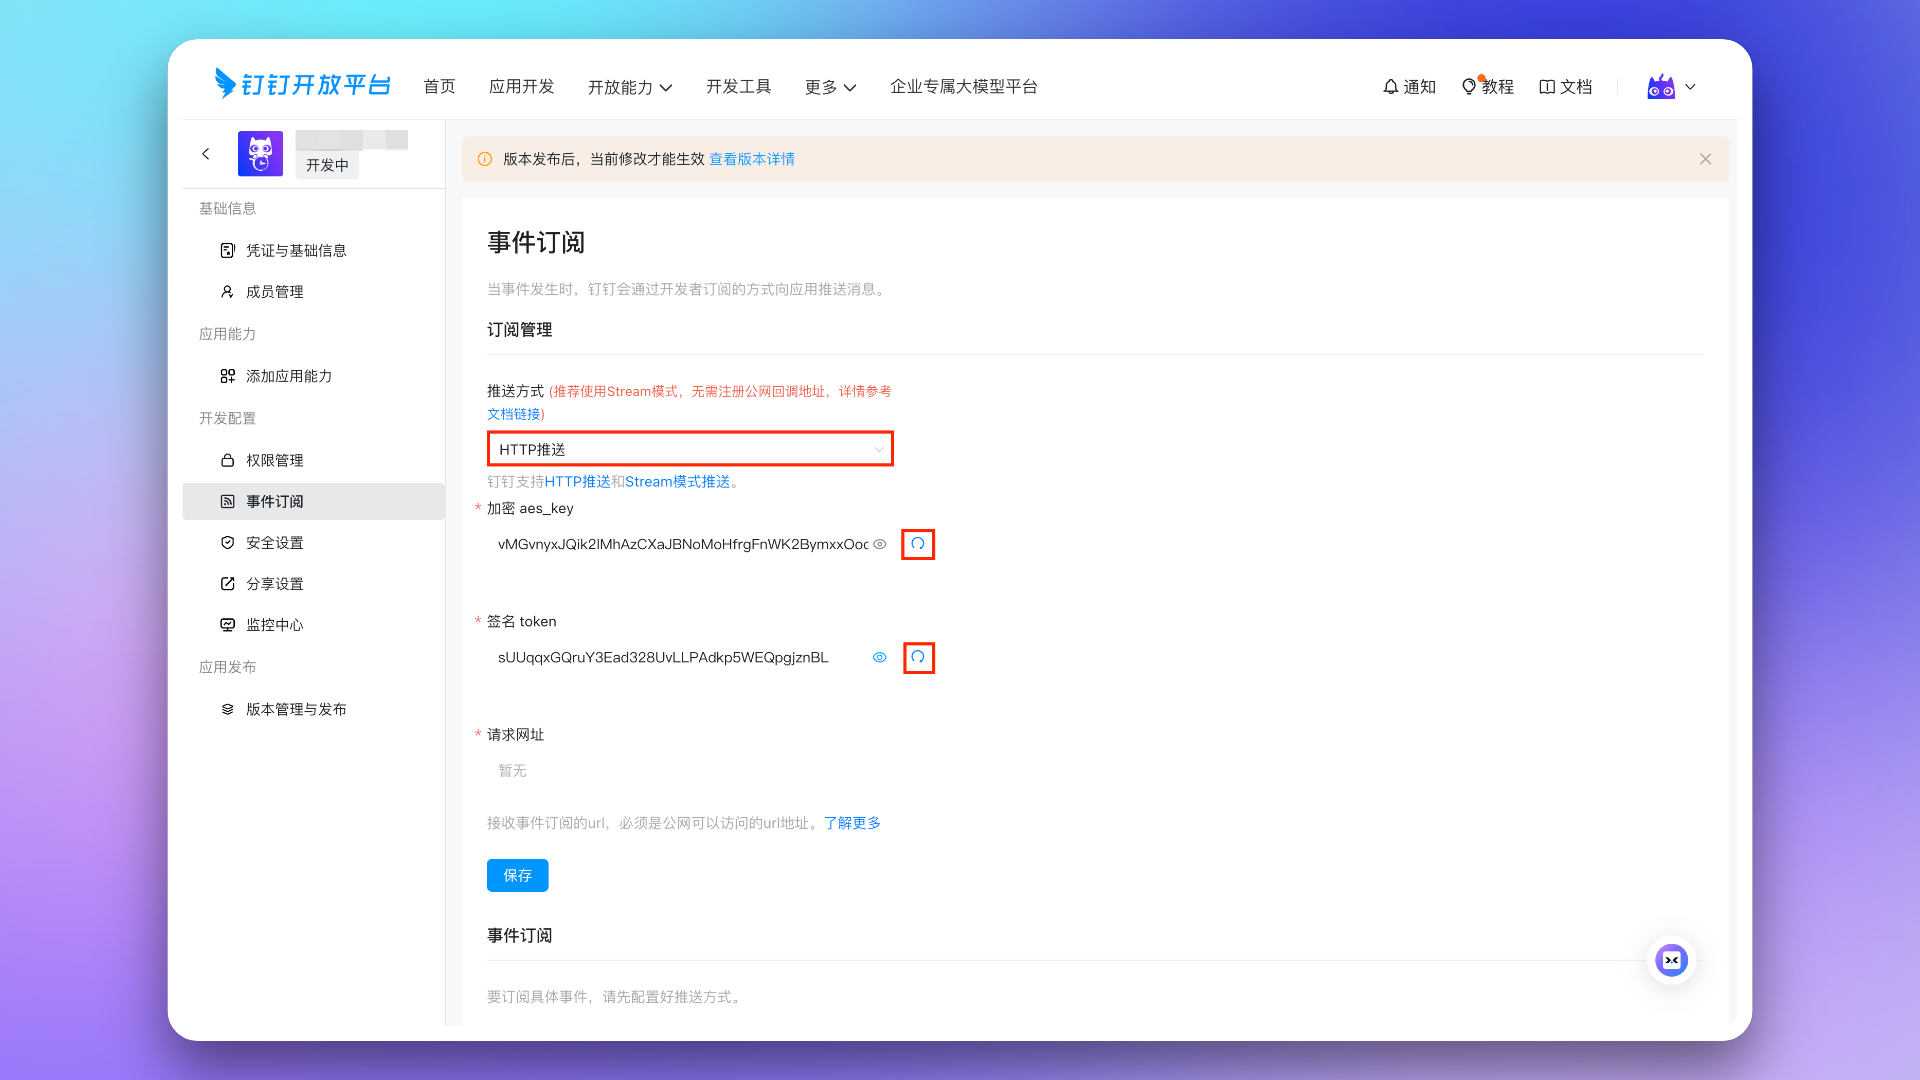 Return to Flashduty On-call integration configuration page, fill in the corresponding
 Encryption aes_key and Signature Token, click Save.
5. Configure Event Subscription
Go to Development Configuration → Event Subscription page. Configure Event Subscription Request URL using theEvent Subscription Request URL from Flashduty integration details. Click Save after configuration.
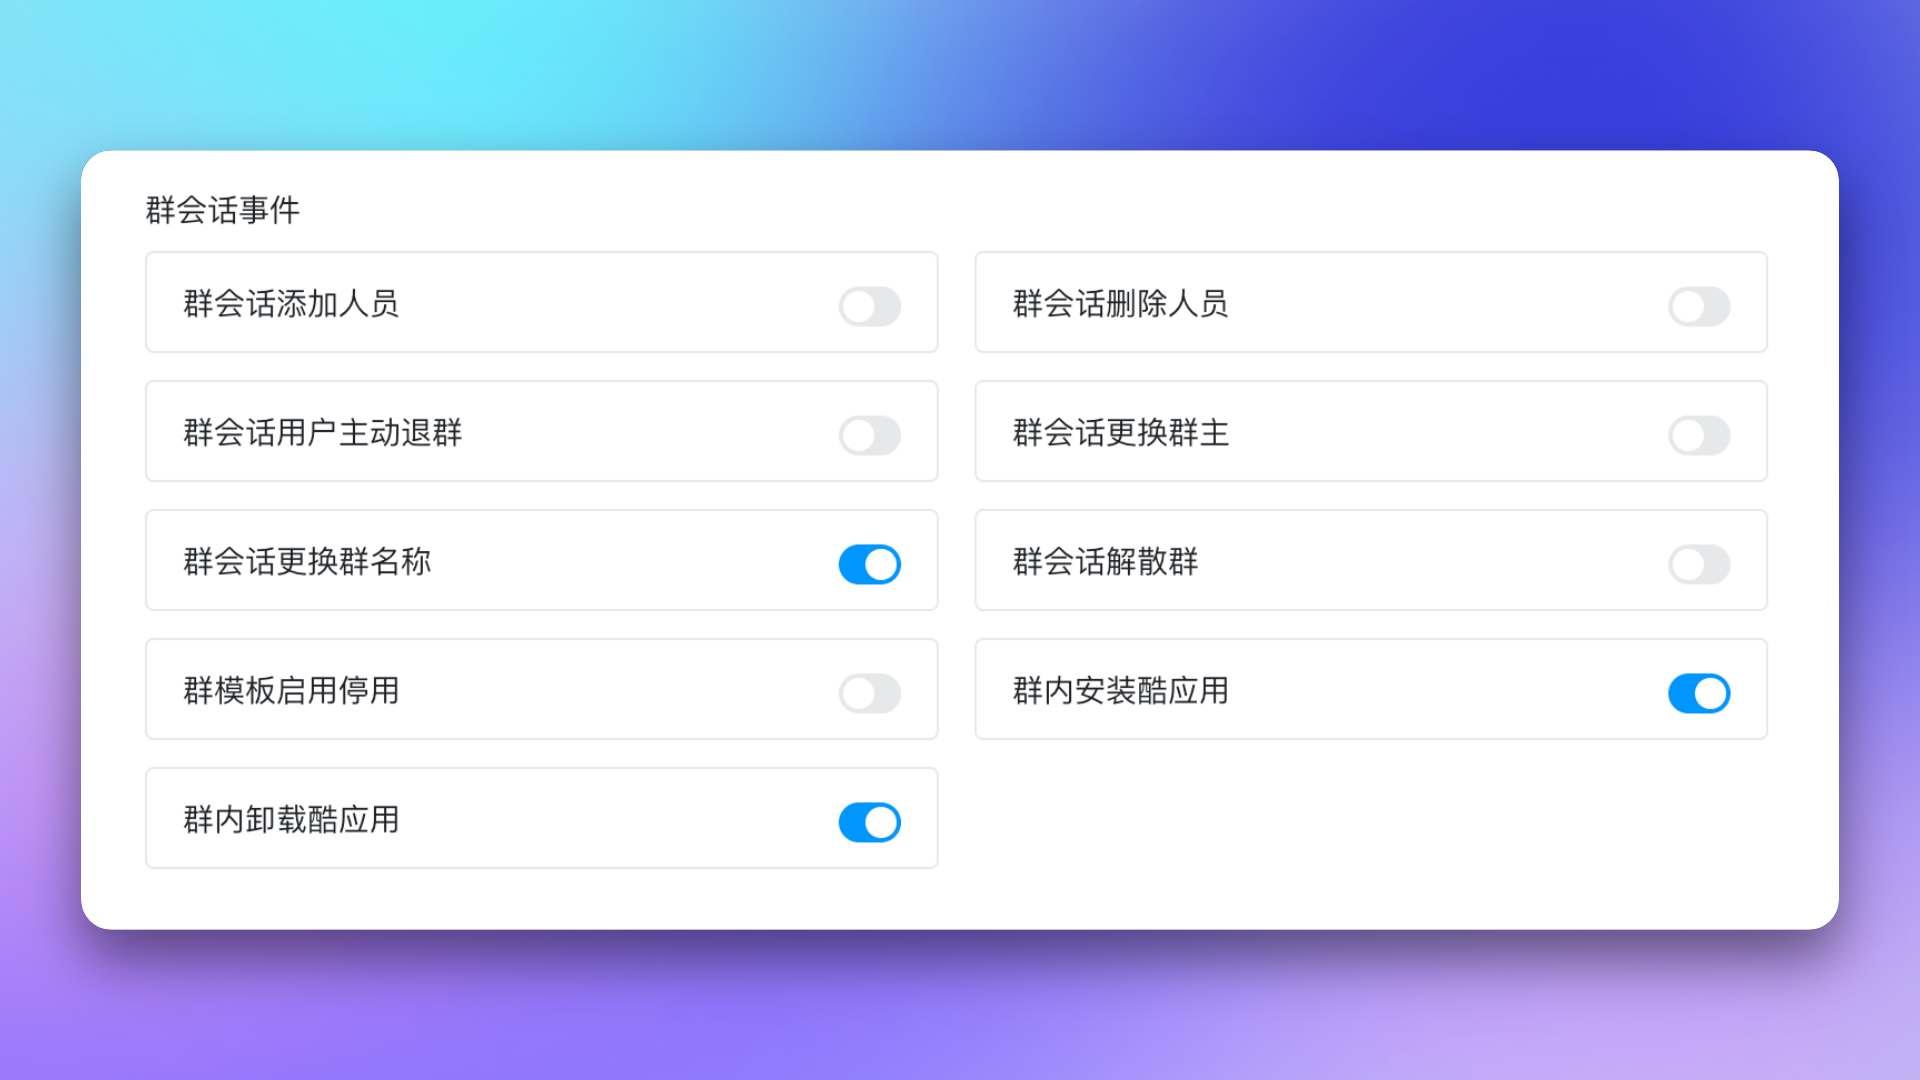
 Below the Save button, select these three group chat events:
 Group chat name changed, Cool app installed in group, and Cool app uninstalled from group, then click Save.
6. Add App Capabilities
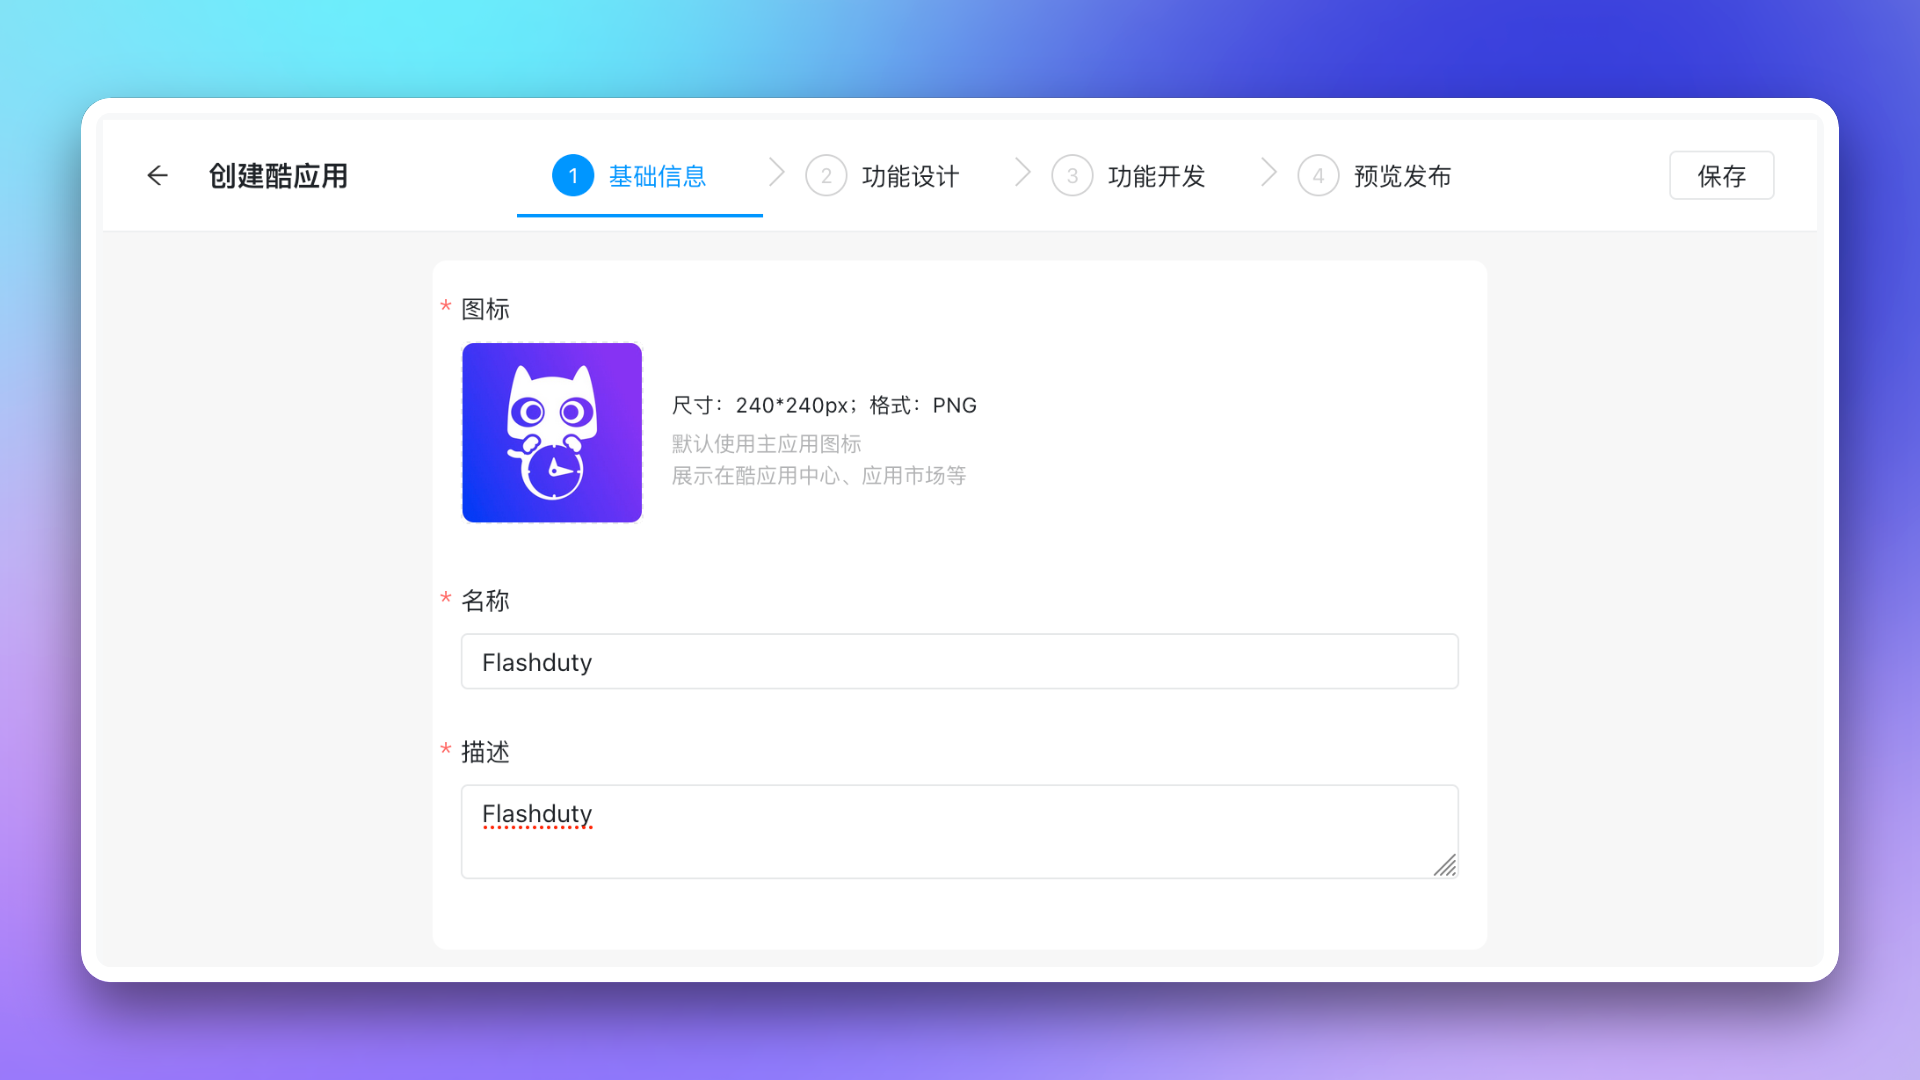
Create a Cool App. Go to Development Configuration → Add App Capabilities → Cool Apps → Cool Apps List page, click Create Cool App, select Extend to Group Chat. Enter the Edit Cool App page and complete the following steps:- Fill in basic information. You can use the Flashduty official icon as the icon.
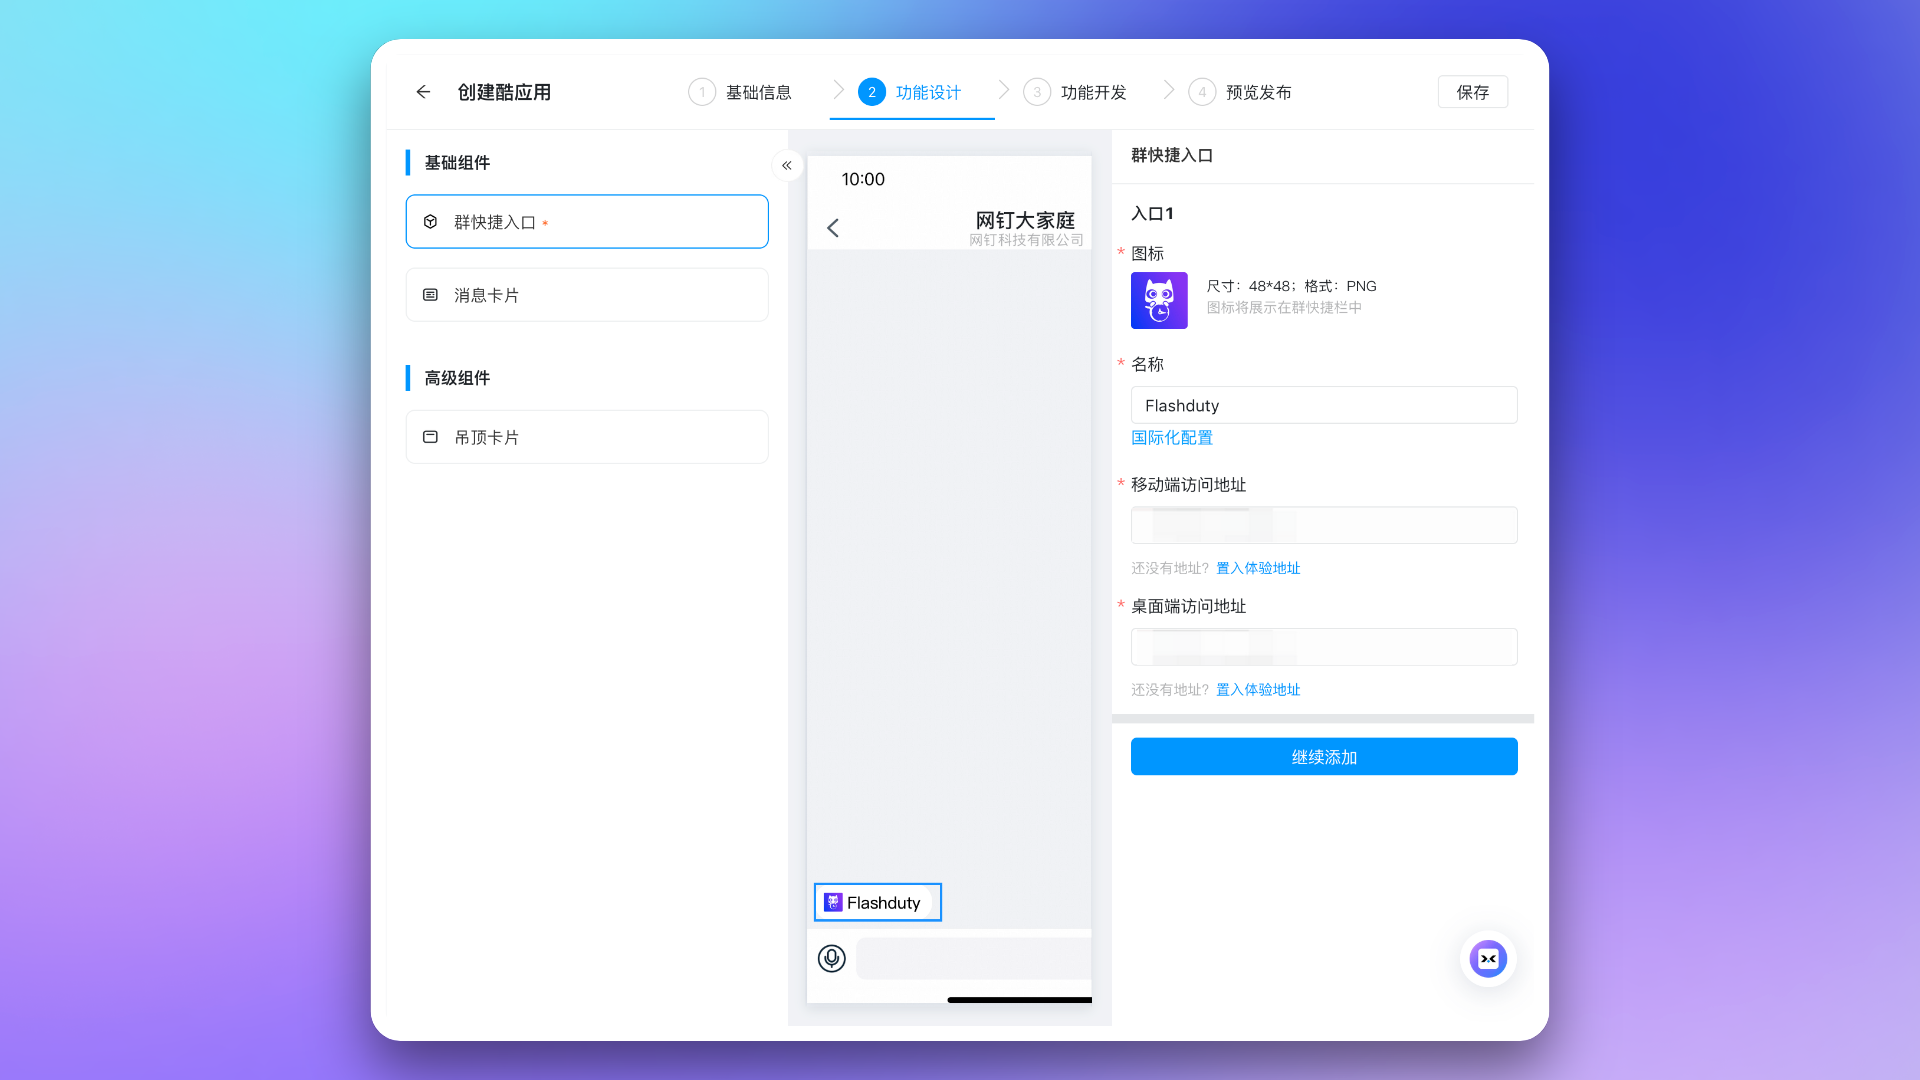
- Configure feature design. Select Group Shortcut Entry and Message Card on the left. You can use the Flashduty official icon for the group shortcut icon; copy the Cool App Web URL from integration details for desktop and mobile access URLs.
- Skip step three (Feature Development), proceed to step four Preview & Publish, click Publish and confirm.
7. Configure Bot and Message Push
Go to App Capabilities → Bot page, enable bot configuration, fill in name and upload icon, then click Save. You can use the Flashduty official icon as the icon.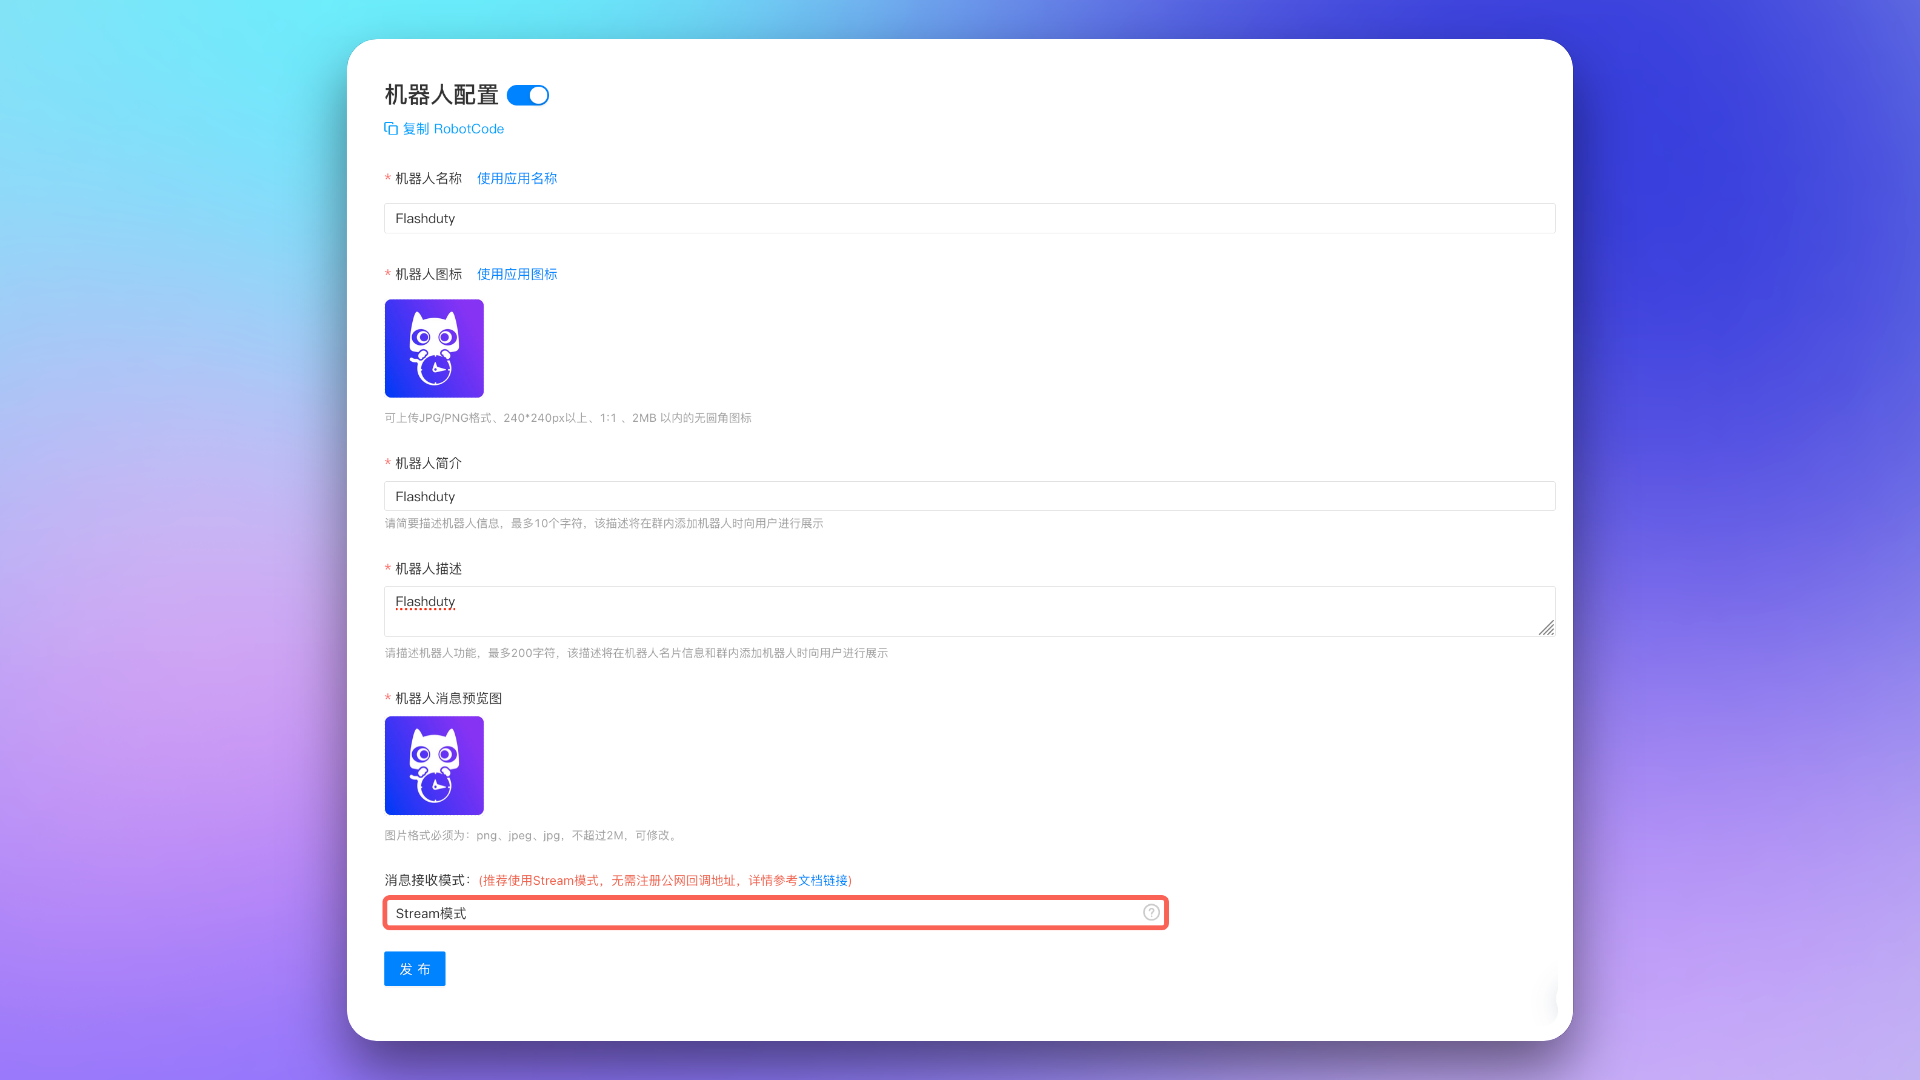
8. Configure App URLs
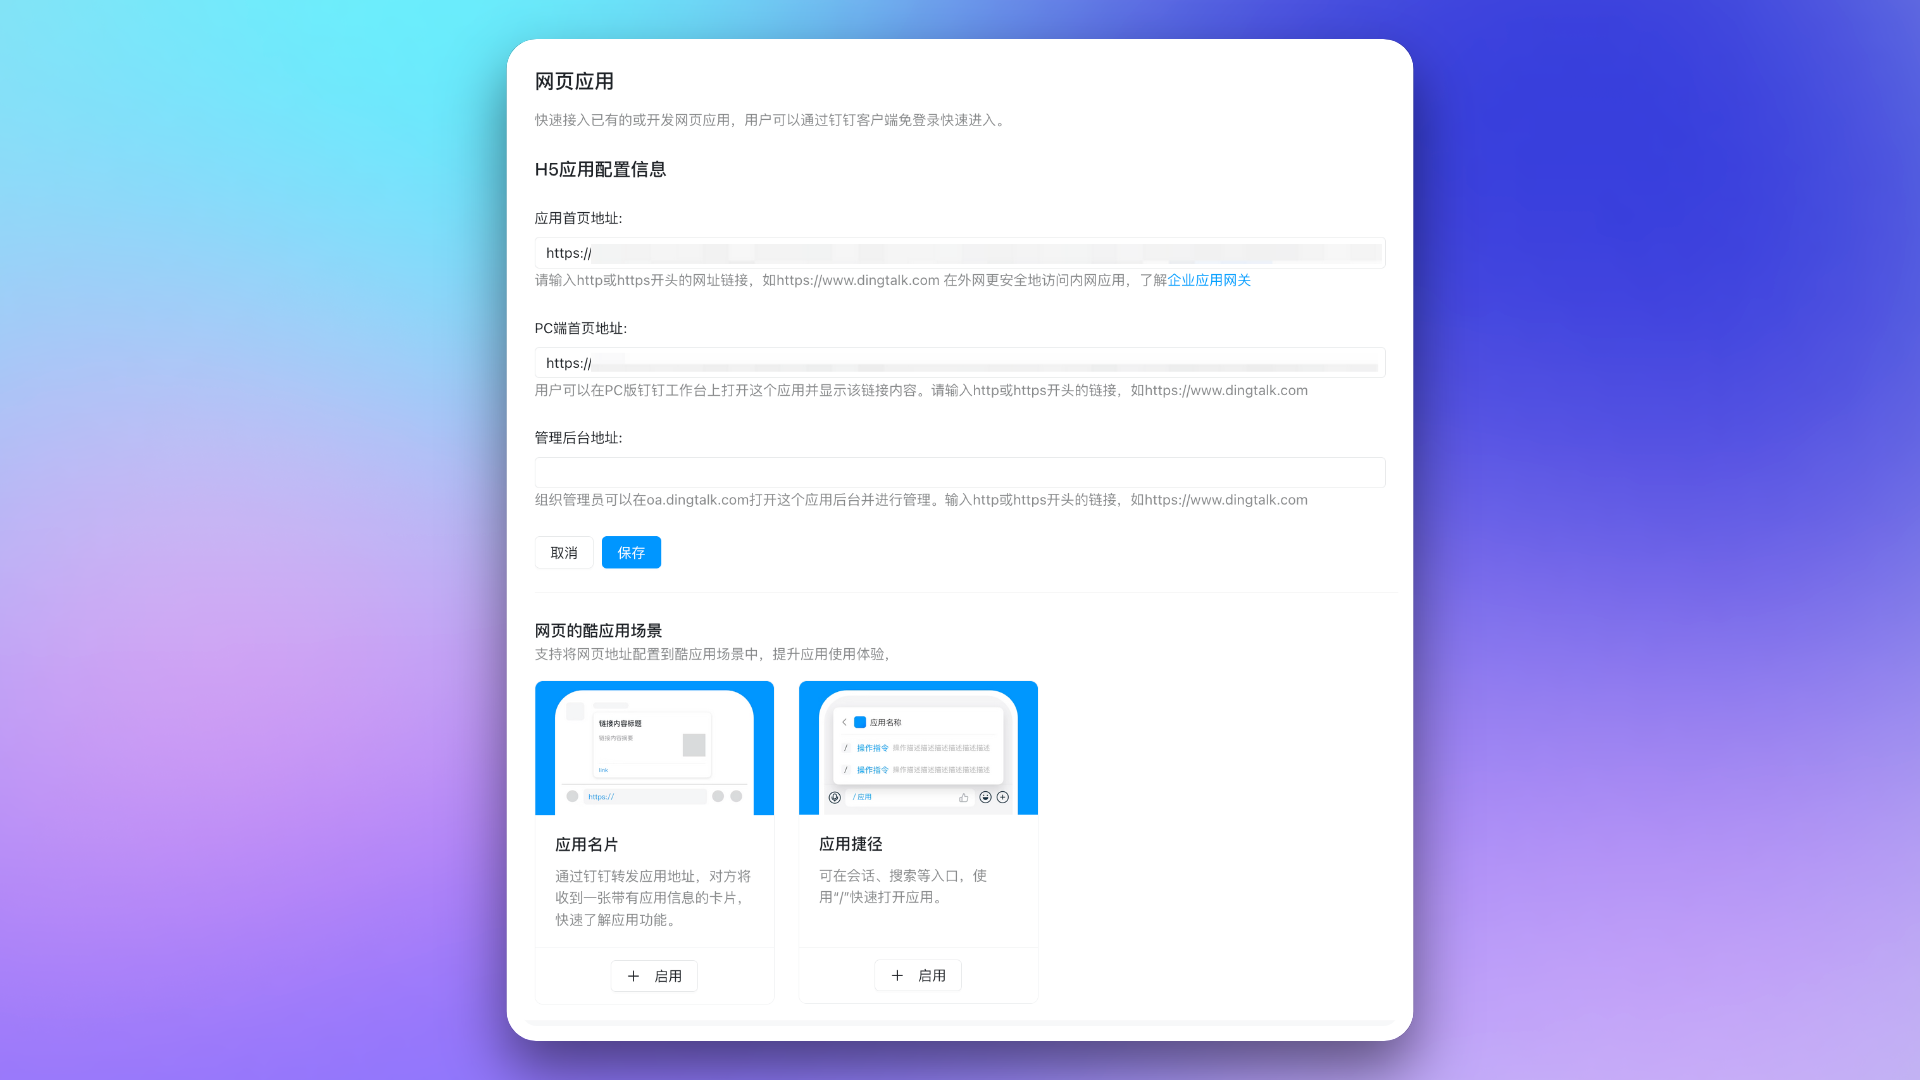
Go to App Capabilities → Web App page. Configure App Homepage URL and PC Homepage URL using theApp Homepage URL and PC Homepage URL from Flashduty integration details. Click Save when done.
9. Request App Permissions
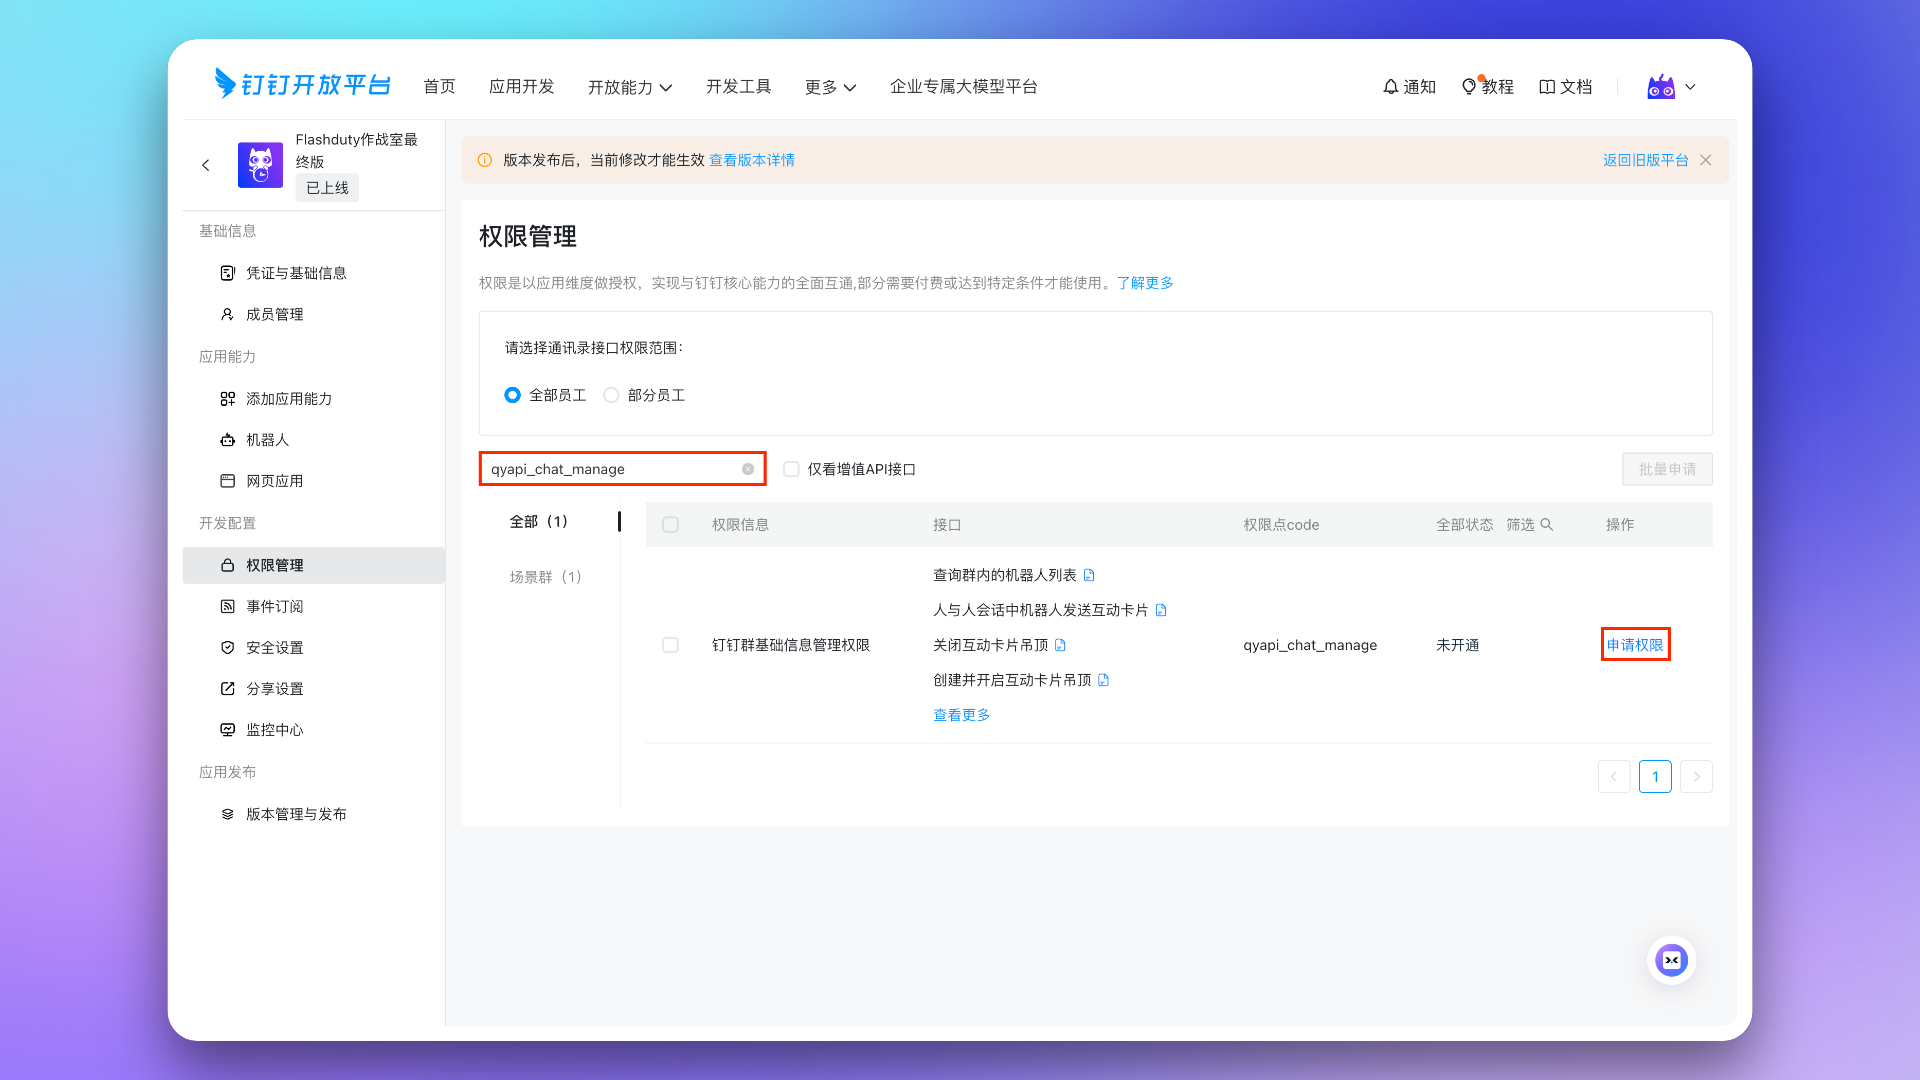
Go to Development Configuration → Permission Management page, request the following permissions for the group app created in previous steps:qyapi_chat_manage: Get group chat informationqyapi_robot_sendmsg: Send messages to group chats or individuals
If you need to continue configuring War Room, publish the custom app once first. After the app is published, you can select it from the Available Apps list in Scene Groups. See App Publishing and Usage for the publishing path.
2. Configure War Room
Before configuring War Room, confirm that the app has been granted the AI SRE required permissions listed at the beginning of this page.
1. Request App Permissions
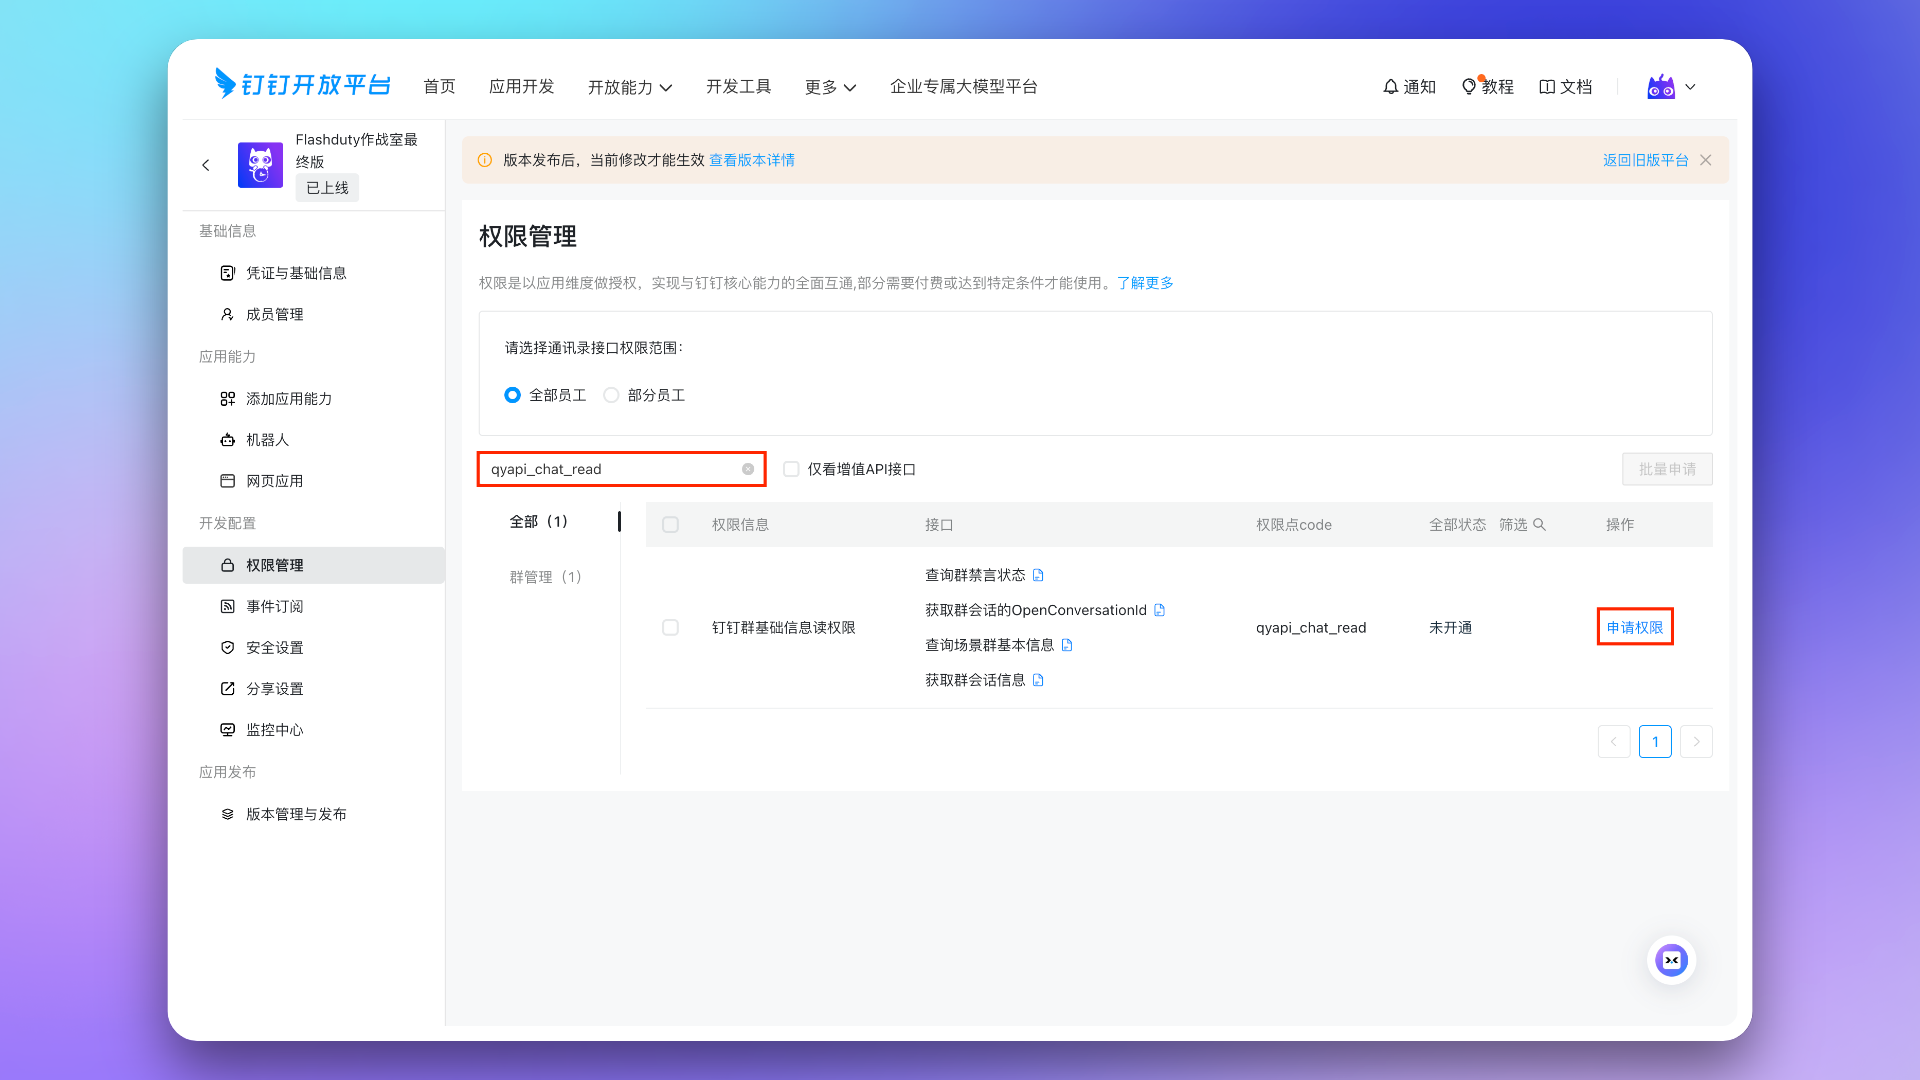
Go to Development Configuration → Permission Management page, request the following permissions for the group app created in previous steps:qyapi_chat_read: Get group chat informationqyapi_chat_base_read: Get group chat informationqyapi_get_member_by_mobile: Allow the current app to get Dingtalk users by phone number for inviting users to join group chats
2. Configure Group Template
Navigate to Open Capabilities → Scene Groups via the Dingtalk Open Platform top menu bar.- Configure Group Bot. Select Bot in the left menu, then click Create Group Bot.
The Group Bot configured in this step and the App Bot are two different concepts. Group bots are used to automatically create group bots when generating group chats. Group bots and app bots have different Bot IDs. To enable War Room for Dingtalk, you must additionally configure a Group Bot.
Dingtalk’s current certificate validation for message callback URLs is not compatible with the ACME-issued certificate used by
api.flashcat.cloud. To ensure Dingtalk can validate the callback URL and deliver messages correctly, replace the domain in the message URL provided by the Flashduty integration configuration page with dingtalk-message.flashcat.cloud.
After configuration, click Create, then click Approve. After “Submission successful” appears in the top right corner, Dingtalk has automatically approved the group bot.
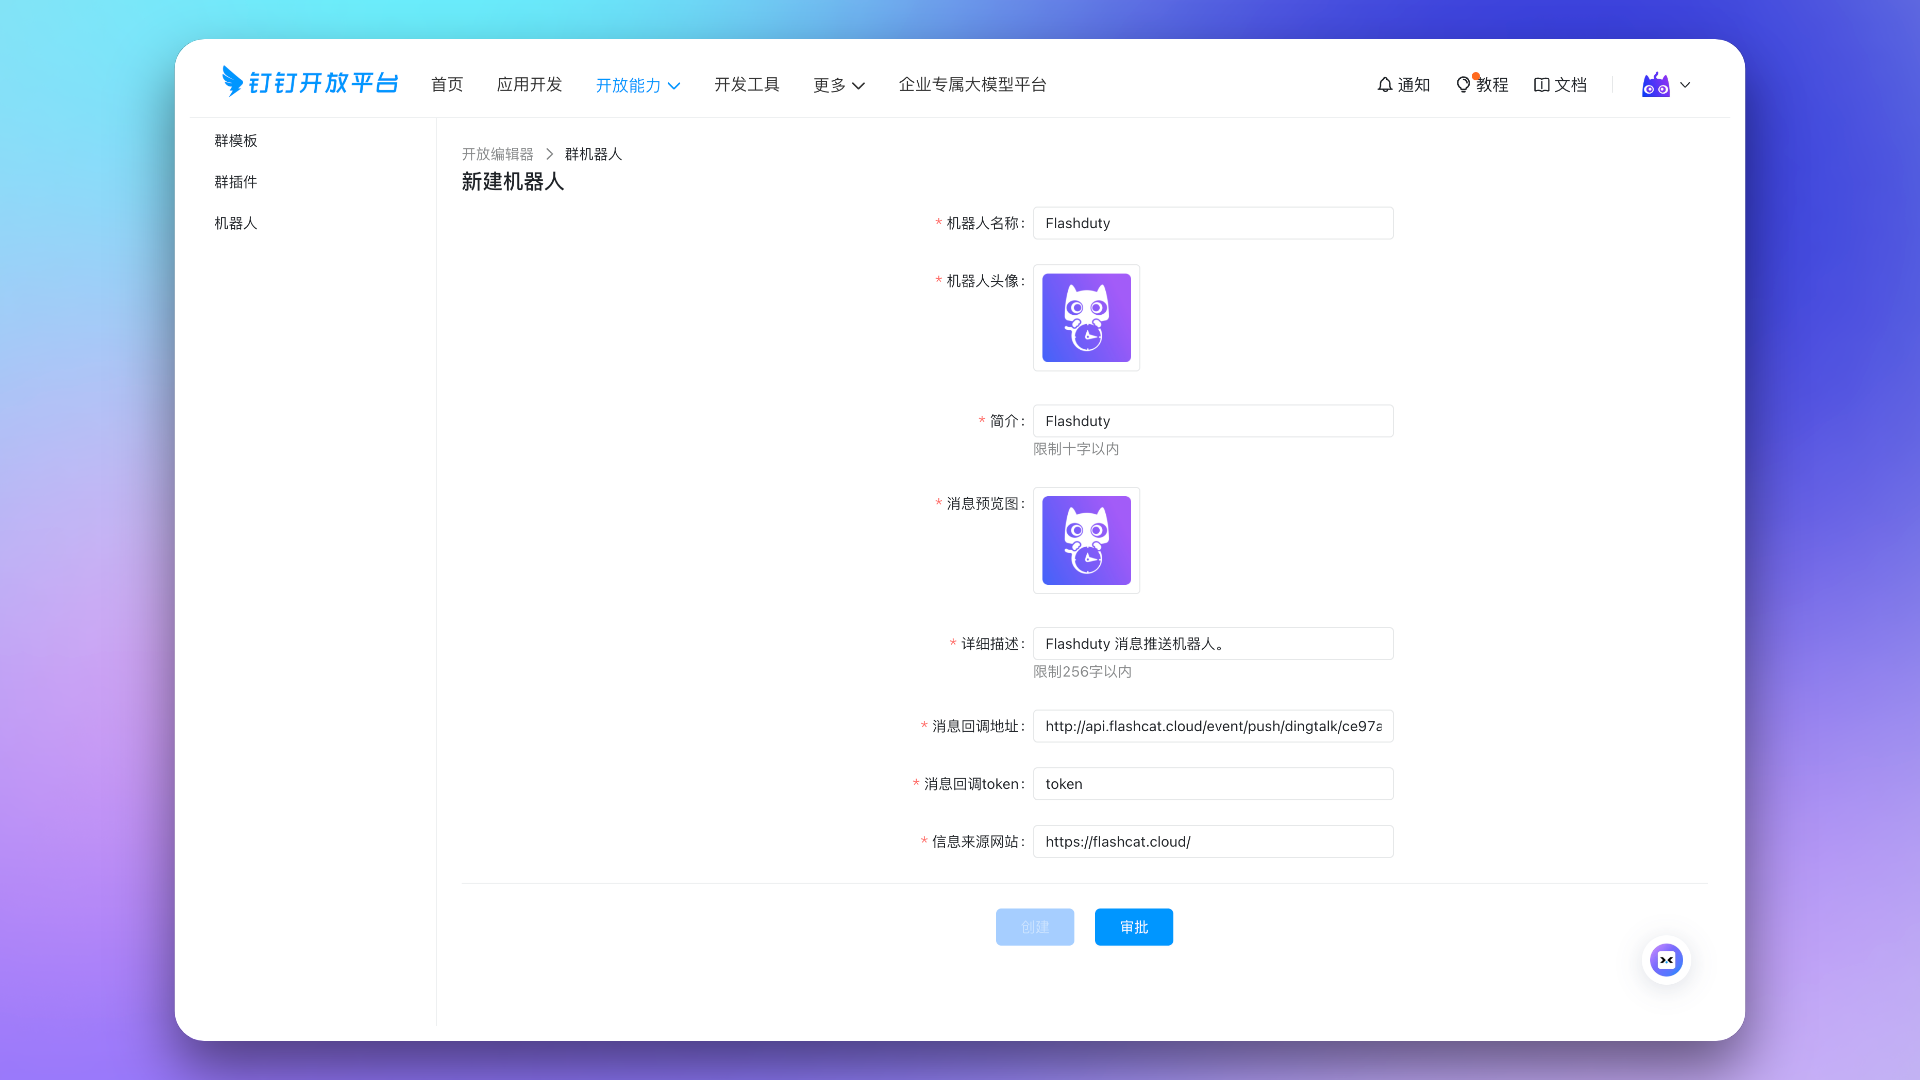
-
Configure Group Template. Select Group Template in the left menu, click Create Group Template.
Set Enterprise Type to
Internal, and set Available Apps to the published custom app created in previous steps. Then fill in template information in the next step. Template Name, Icon, Description, Text Introduction, Template Description, Image Introduction and other descriptive information won’t affect group template functionality—you can configure any values that meet requirements. Example Configuration:In Select Bot configuration, click Select Created Bot, select the group bot created in the previous step. Keep other configurations as default. Finally click Save Edit.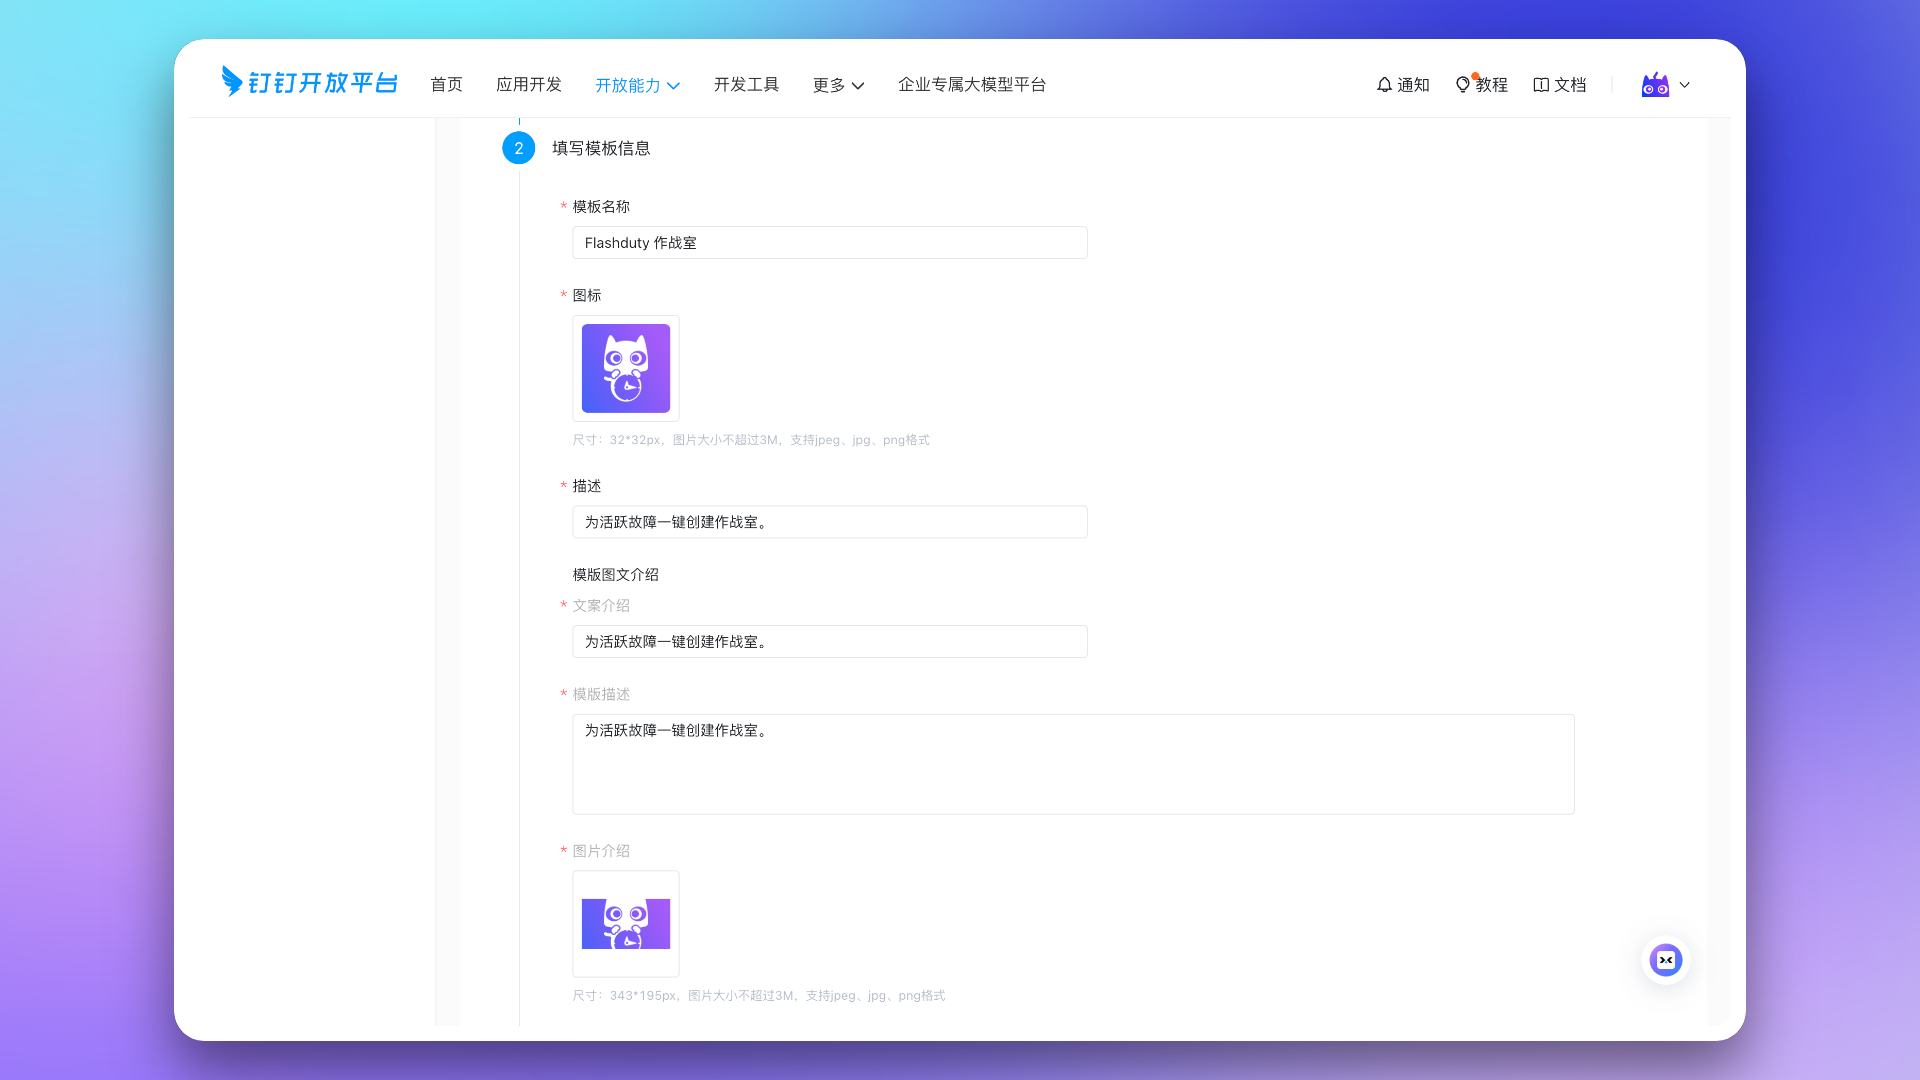
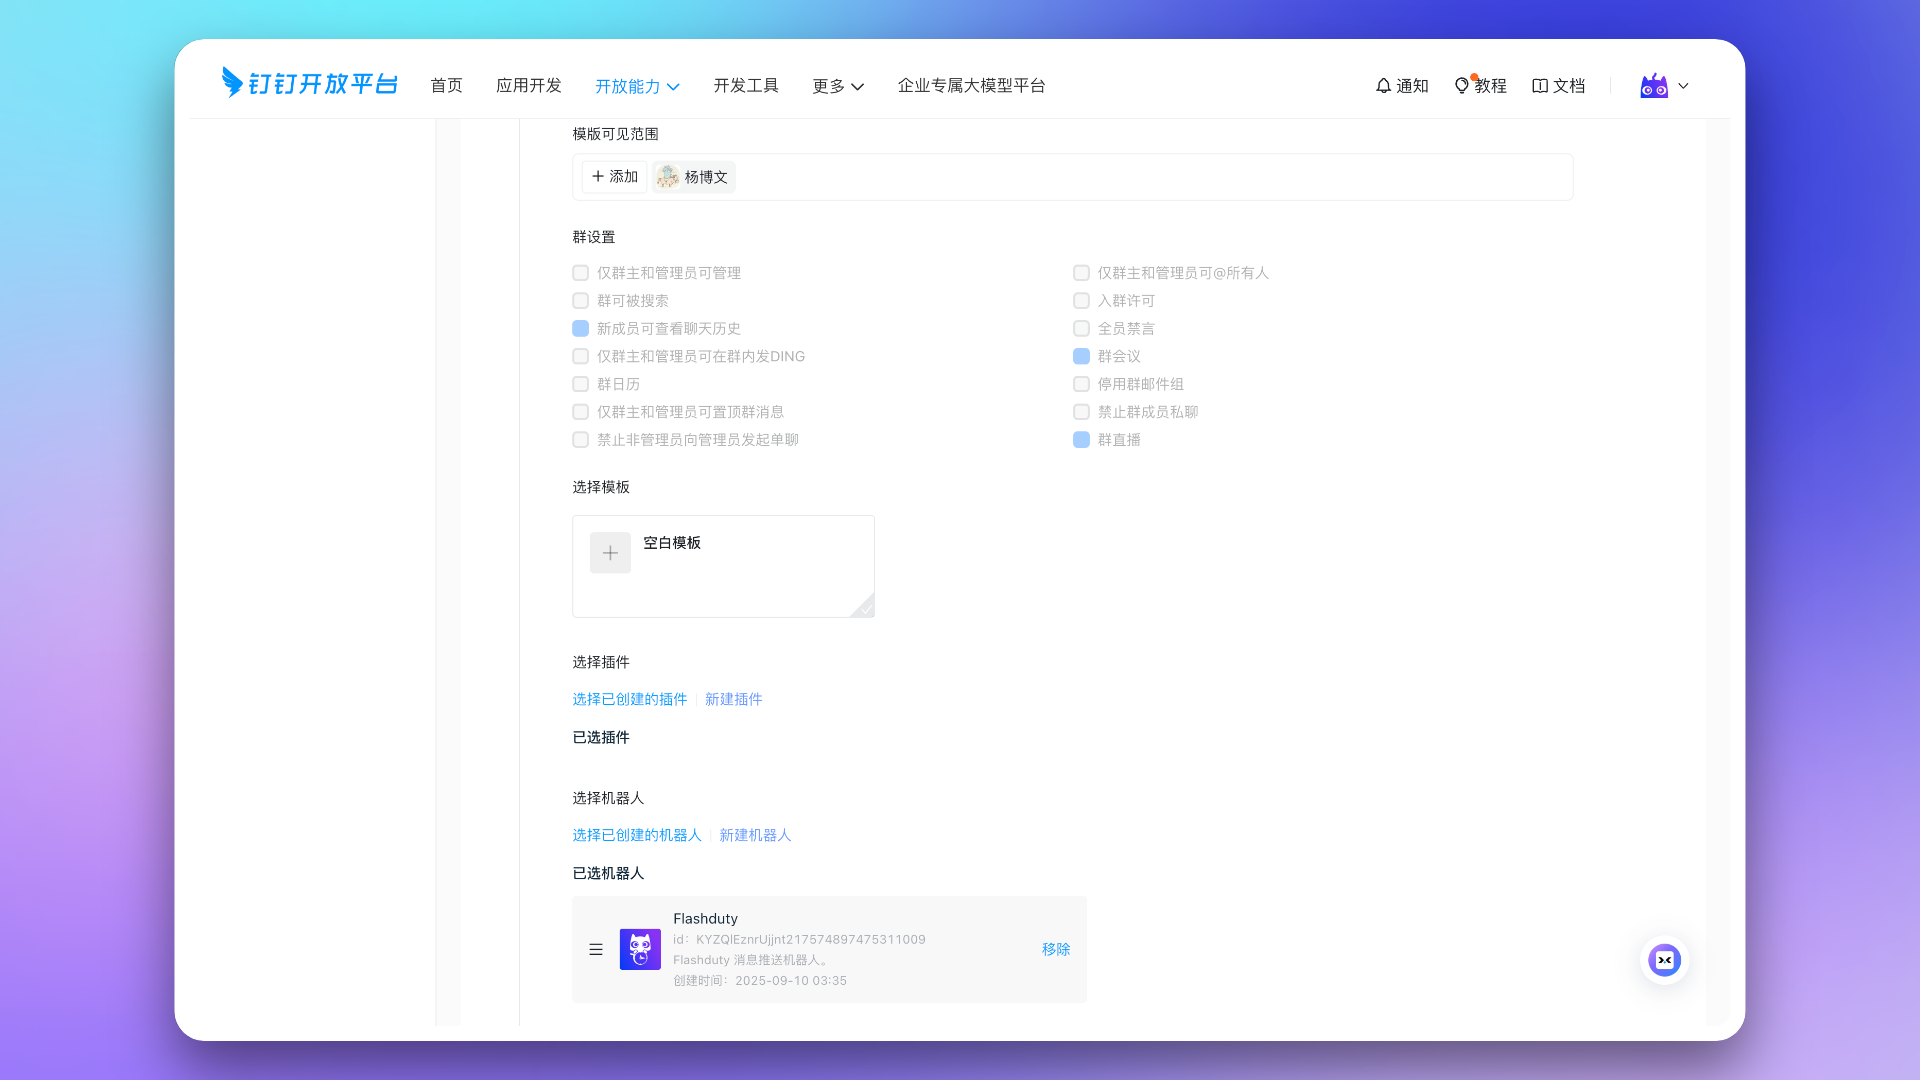 In the Fill in Gray Group step, click Create Gray Group, then click Publish Gray.
Finally, click Group Template in the left menu again, then click to enter the group template just created. Click Submit for Review, after Dingtalk automatically approves, finally click Publish.
In the Fill in Gray Group step, click Create Gray Group, then click Publish Gray.
Finally, click Group Template in the left menu again, then click to enter the group template just created. Click Submit for Review, after Dingtalk automatically approves, finally click Publish.
-
On the published group template details page, copy Template ID and Bot ID.
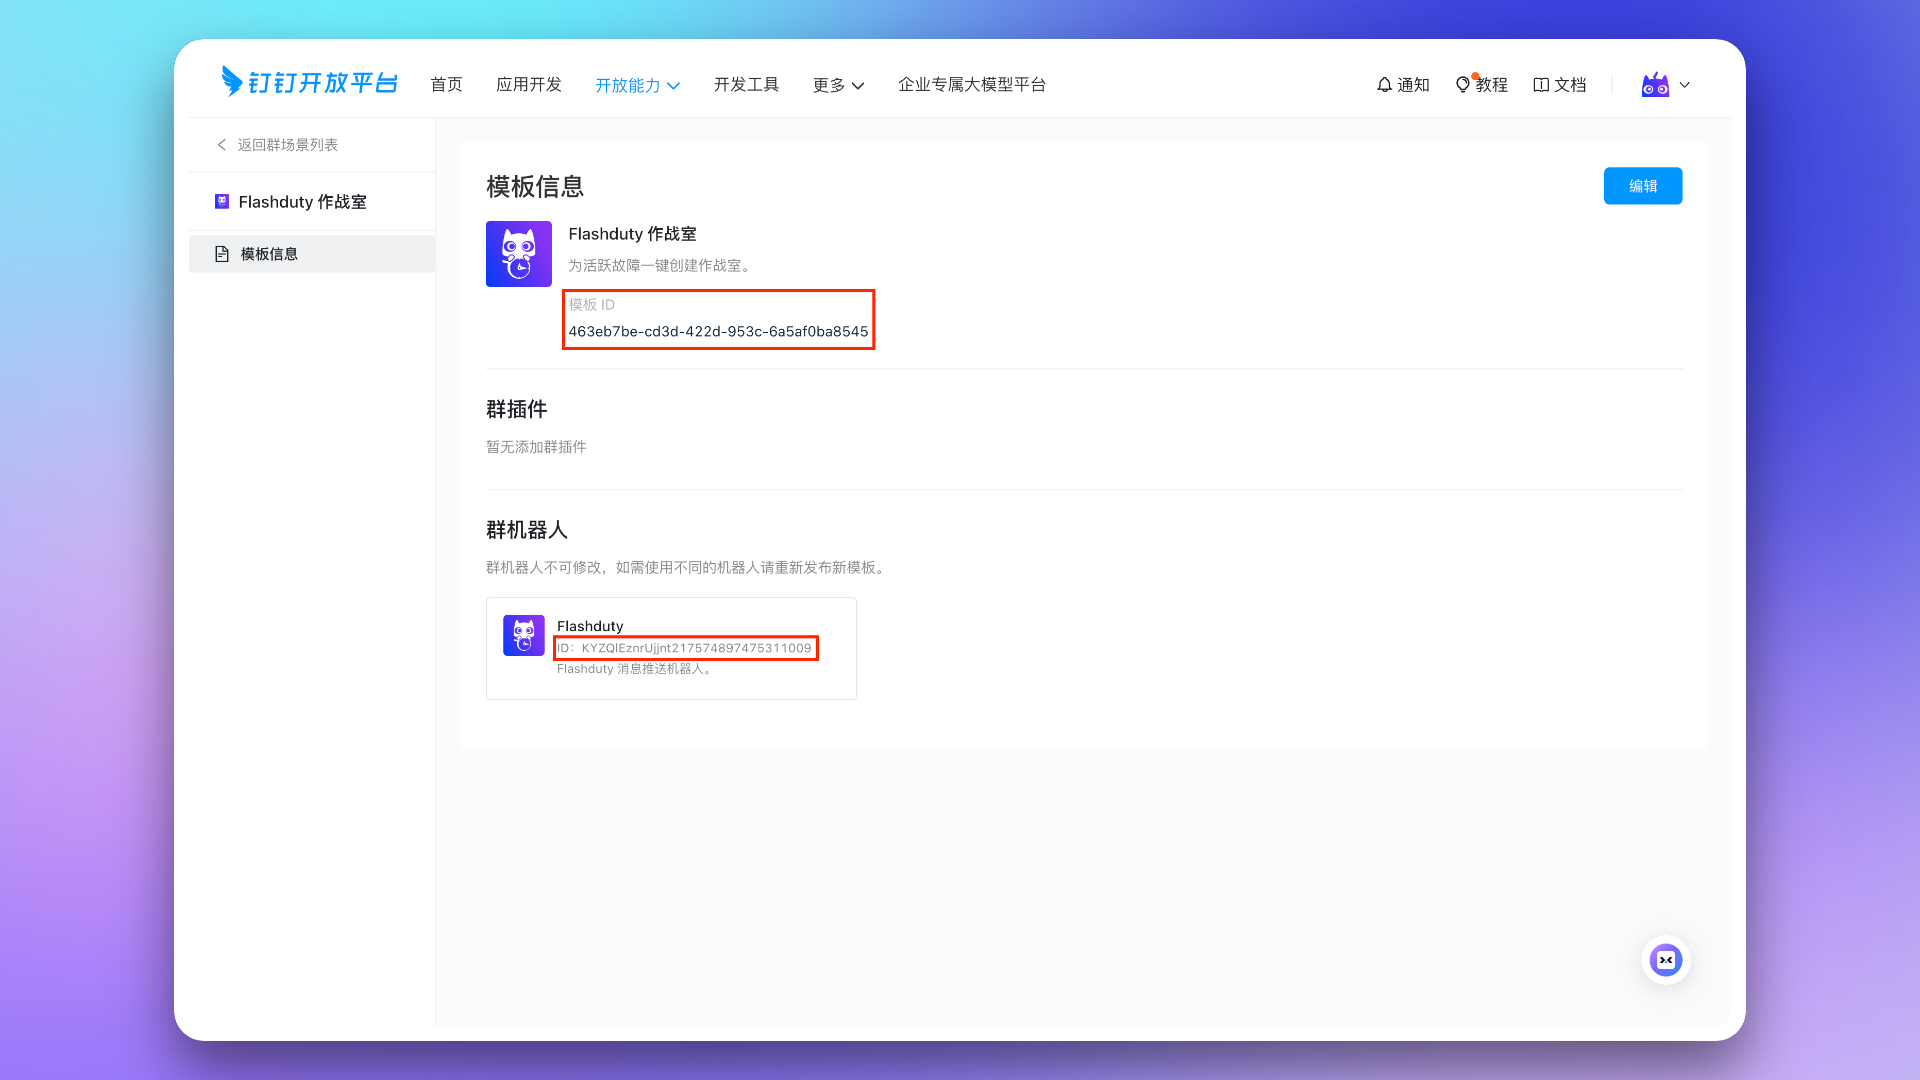 Return to Flashduty On-call integration configuration page, fill in the corresponding
 Template IDandBot ID, click Save.
AI SRE Controls
Configure the following AI SRE controls under Enhanced Features. Both are enabled by default:- Automatically start AI incident analysis: Appears only after you enable War Room. Starts an AI incident analysis when a War Room is created successfully.
- Allow AI SRE conversations in IM: Available without enabling War Room. When enabled, people can @mention AI SRE in a group chat connected through this integration or start a direct conversation with the bot. When disabled, neither entry point triggers an AI SRE reply.
3. App Publishing and Usage
After completing the above steps, confirm that the custom app has been published with the latest version. If it has not been published yet, or if you changed app settings after publishing, go to App Publishing → Version Management & Publishing, create a new version, and publish it.To ensure everyone can use the app, adjust the app Visibility to all employees before publishing.
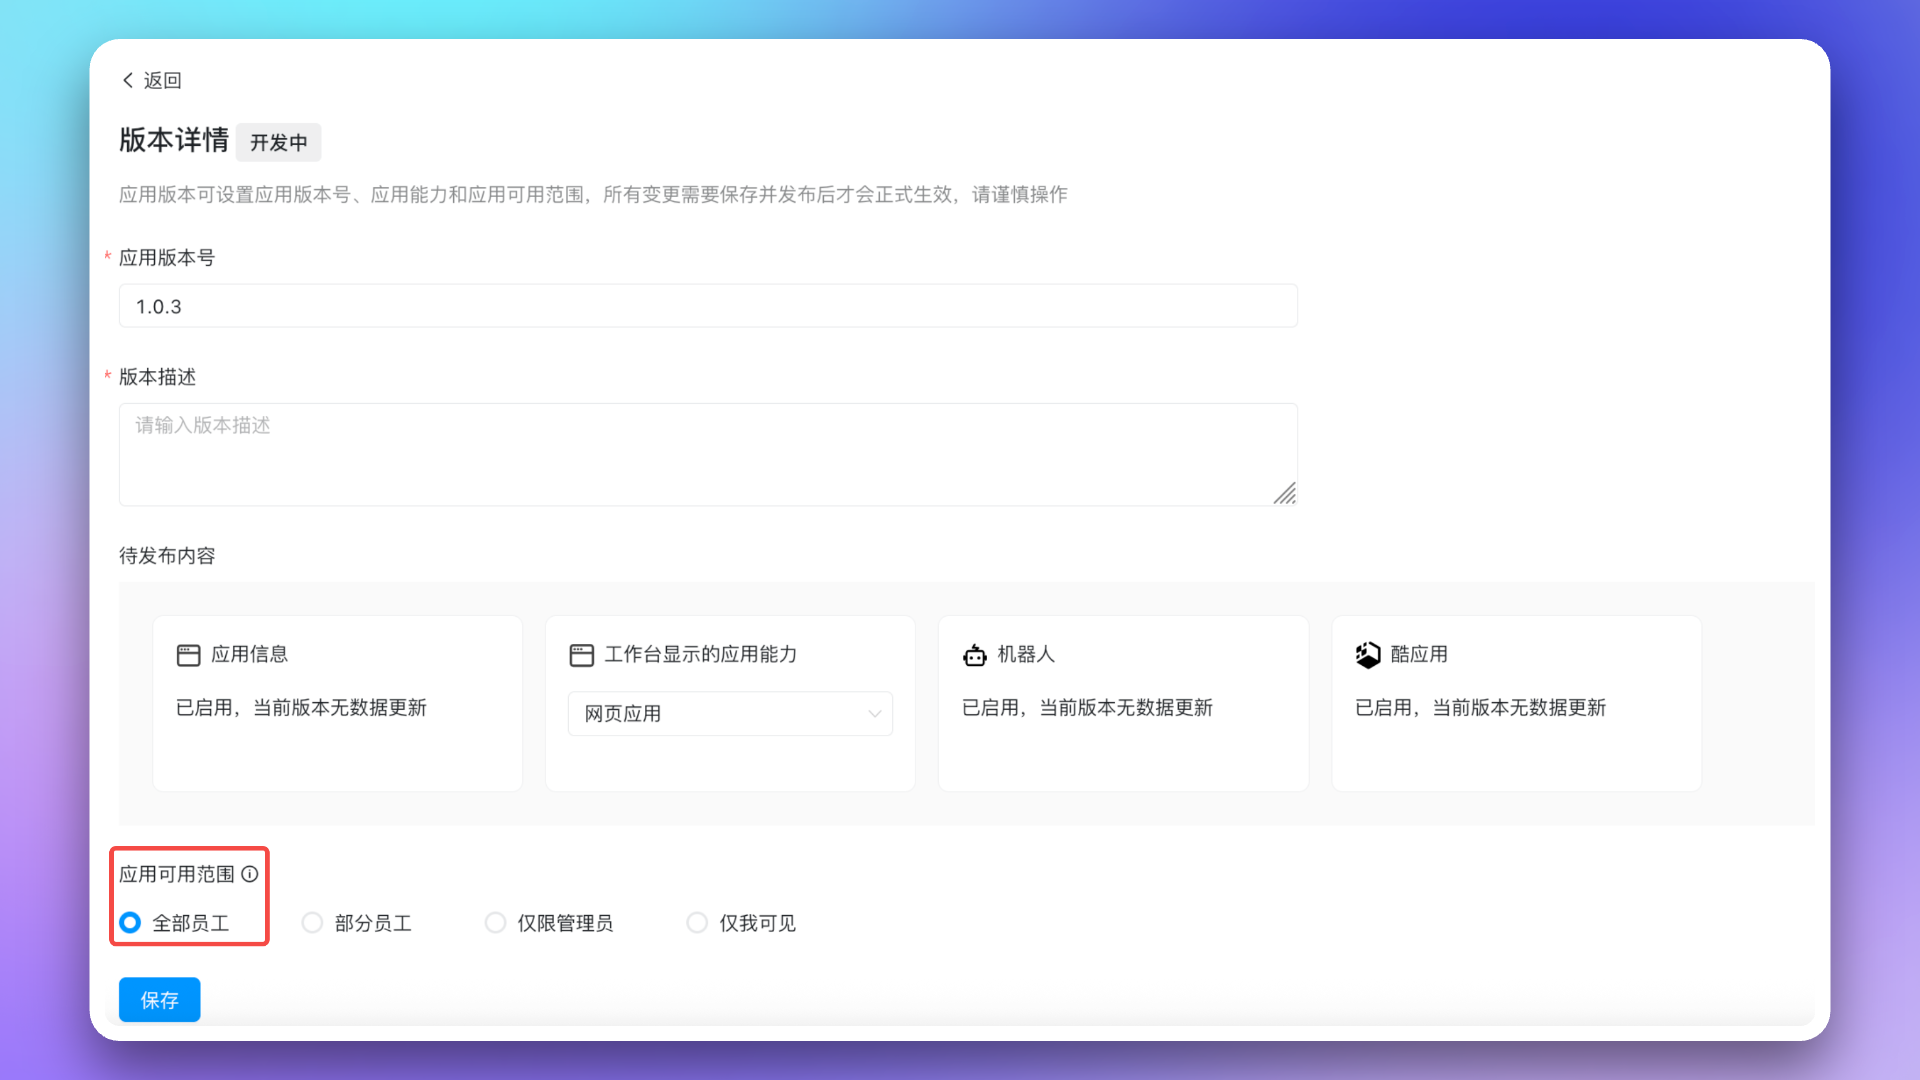 After publishing, you can access the app via Mobile or Desktop. First access requires login to link Dingtalk and Flashduty accounts; subsequent access will be passwordless.
- Mobile
- Desktop
Dingtalk → Workspace → Search app name → Open App
4. Linked Users
In the Linked Users tab of the integration detail page, you can view the linking status between team members and Dingtalk accounts, and quickly complete batch linking.View Linking Status
The linked users list shows all team members and their linking status. You can filter by:
Search by name or email is supported.
One-Click Linking
When unlinked members exist, click the One-Click Link button. The system will attempt to obtain Dingtalk account IDs via phone numbers and automatically link them, equivalent to members logging into Flashduty using the same phone number on Dingtalk.5. FAQ
Messages cannot be delivered to individuals, operation log shows 'App not linked'?
Messages cannot be delivered to individuals, operation log shows 'App not linked'?
Go to Dingtalk → Workspace → Search app name → Open App, complete one login to link Dingtalk and Flashduty accounts so the system can obtain user identity for message delivery.
Escalation rule Dingtalk group chat list is empty?
Escalation rule Dingtalk group chat list is empty?
- Go to Dingtalk, install the Cool App in the target group chat, otherwise the group chat list cannot be obtained
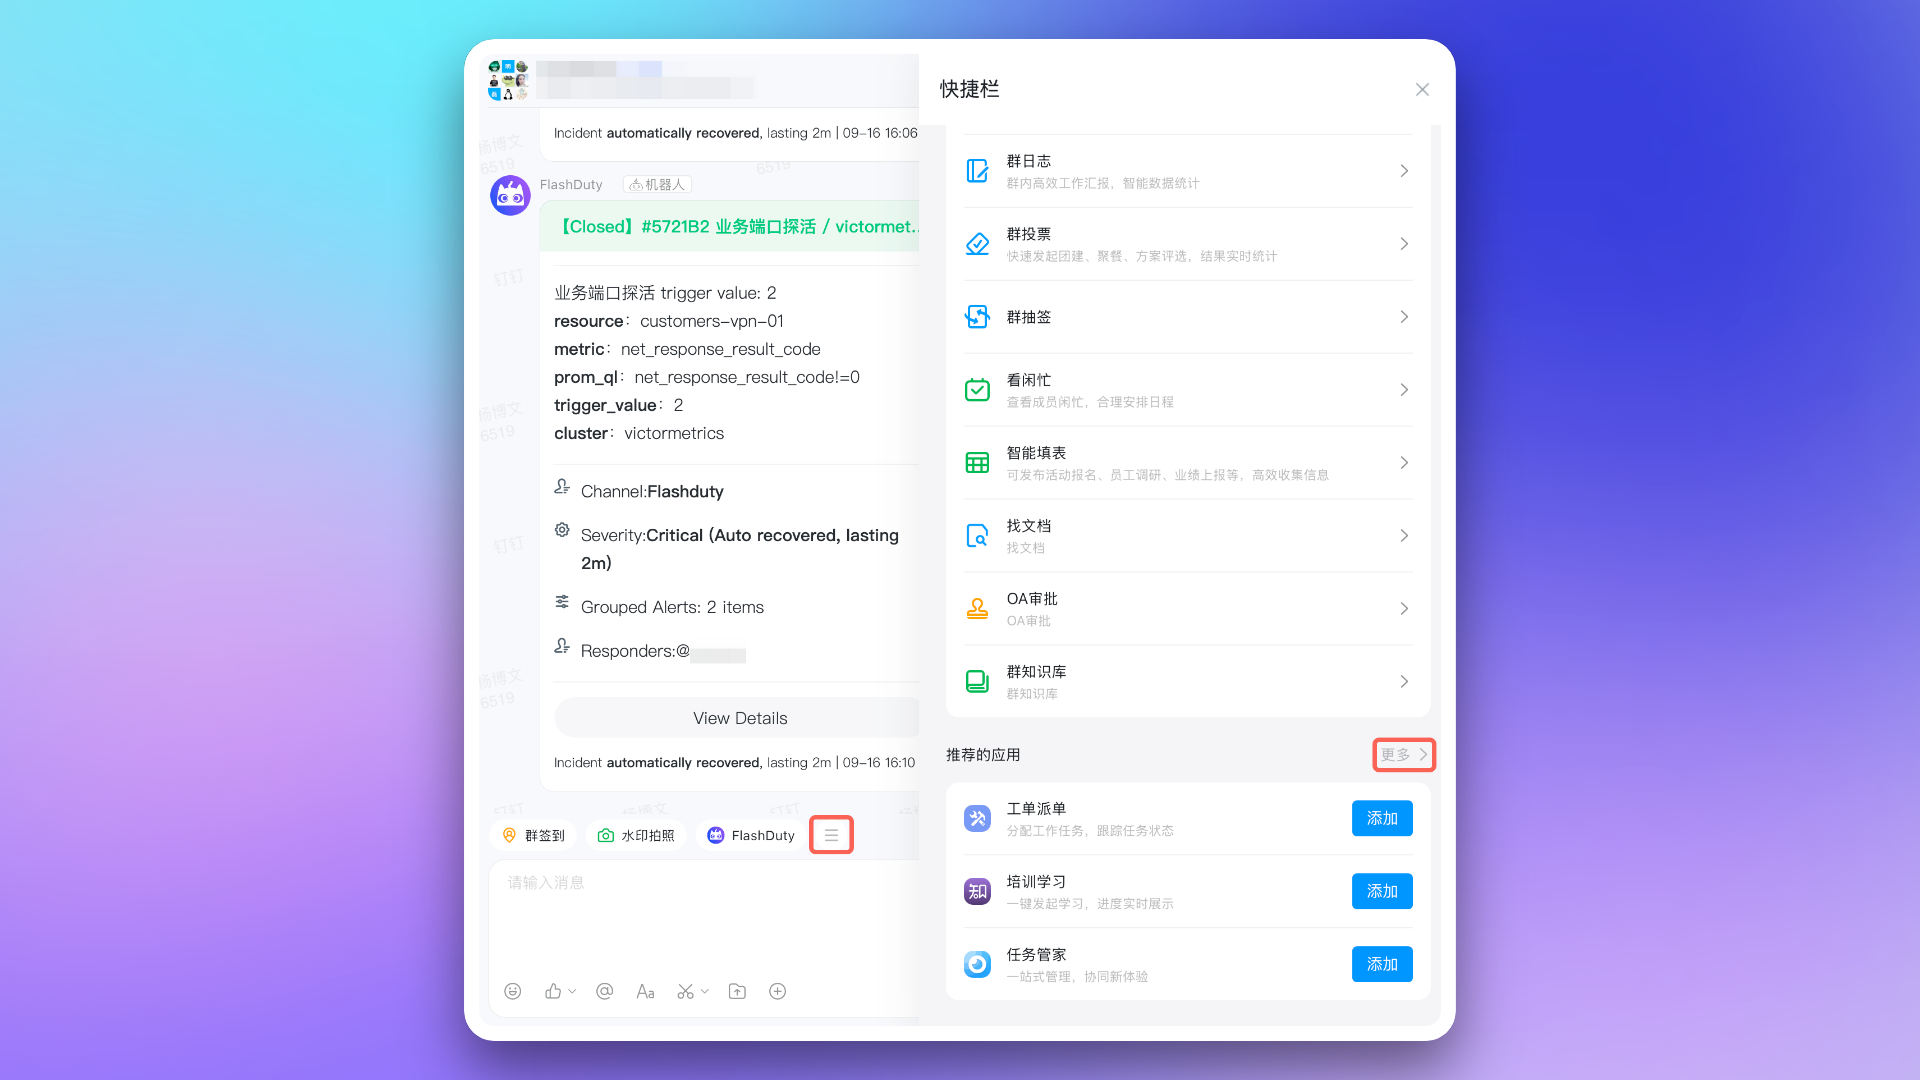
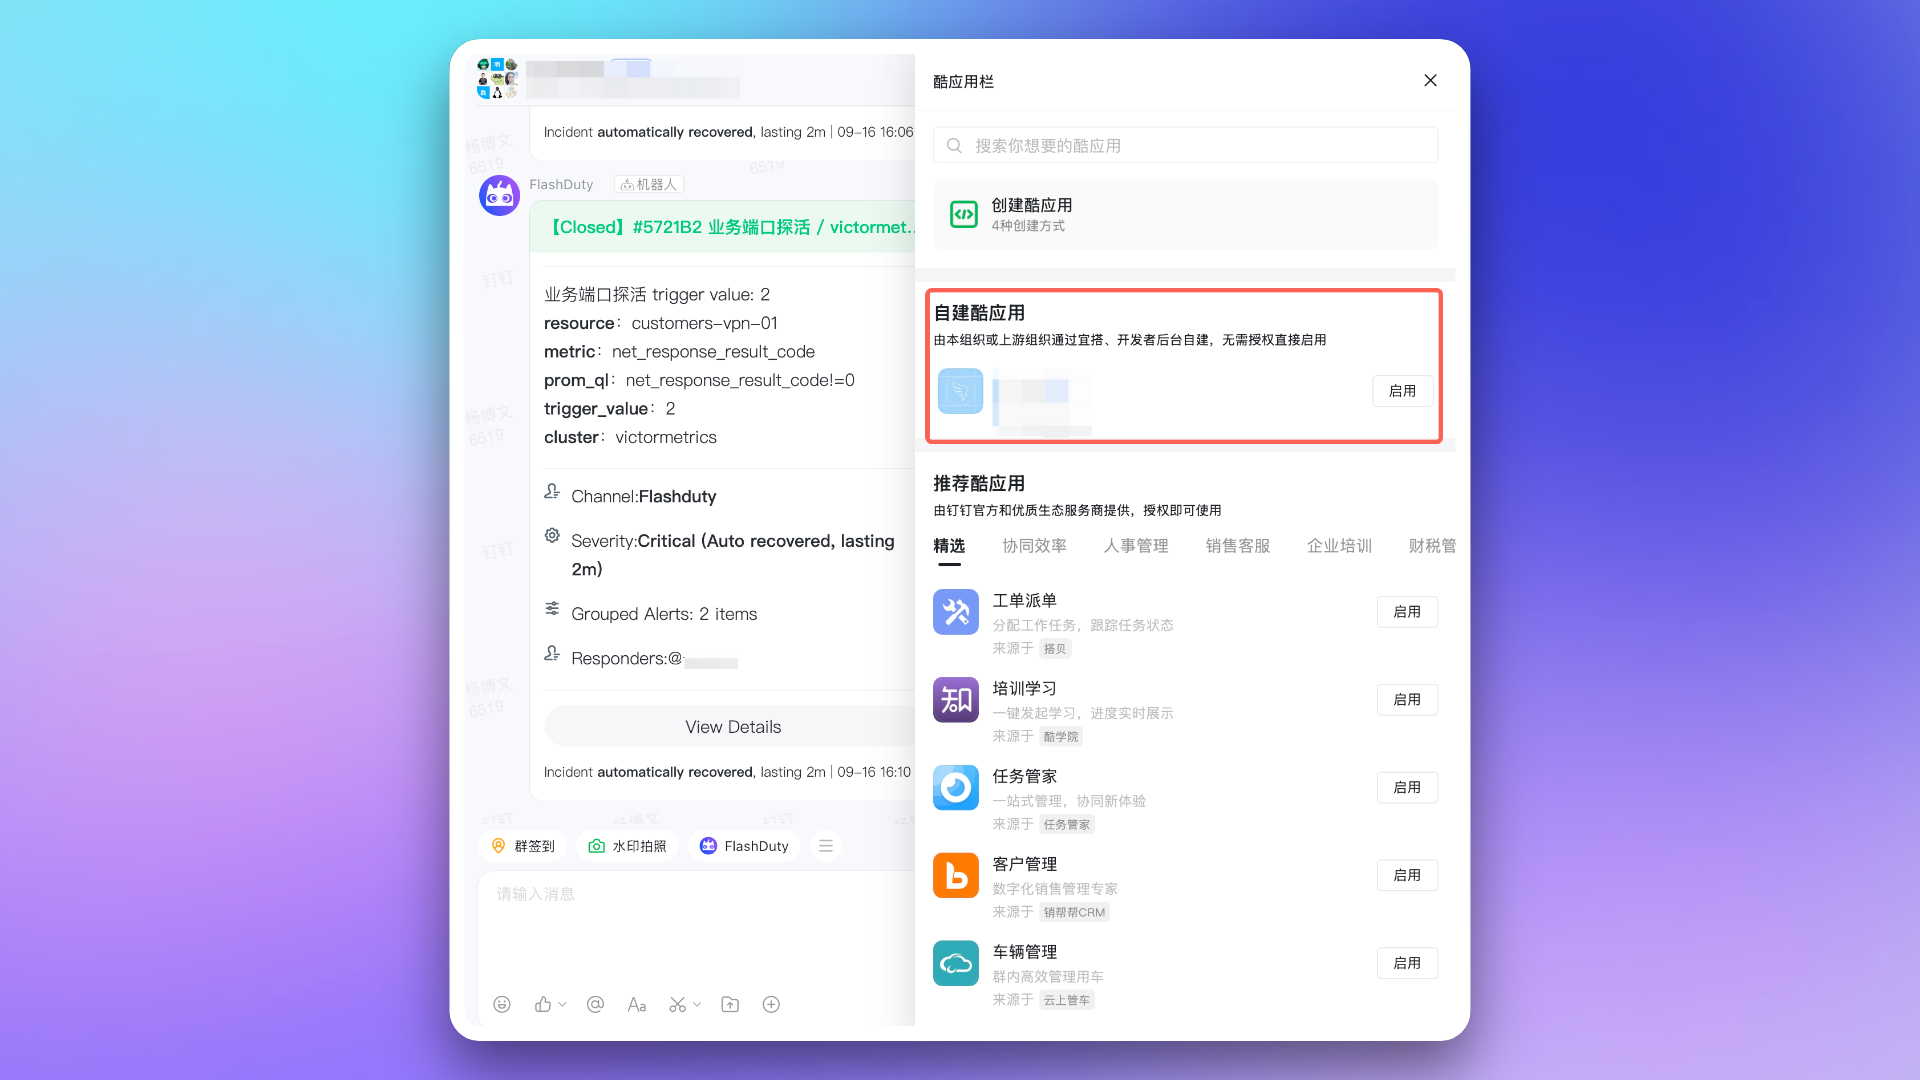
- Return to escalation rule configuration page, refresh and reselect the group chat list
- If still unable to get the group chat list, try uninstalling the Cool App from the group and retry the above steps. If the issue persists, contact customer or dedicated technical support
Why isn't War Room working as expected?
Why isn't War Room working as expected?
- Please check again if the app has been granted the required permissions for War Room functionality
- See the FAQ section in War Room documentation
Dingtalk custom app API call limits?
Dingtalk custom app API call limits?